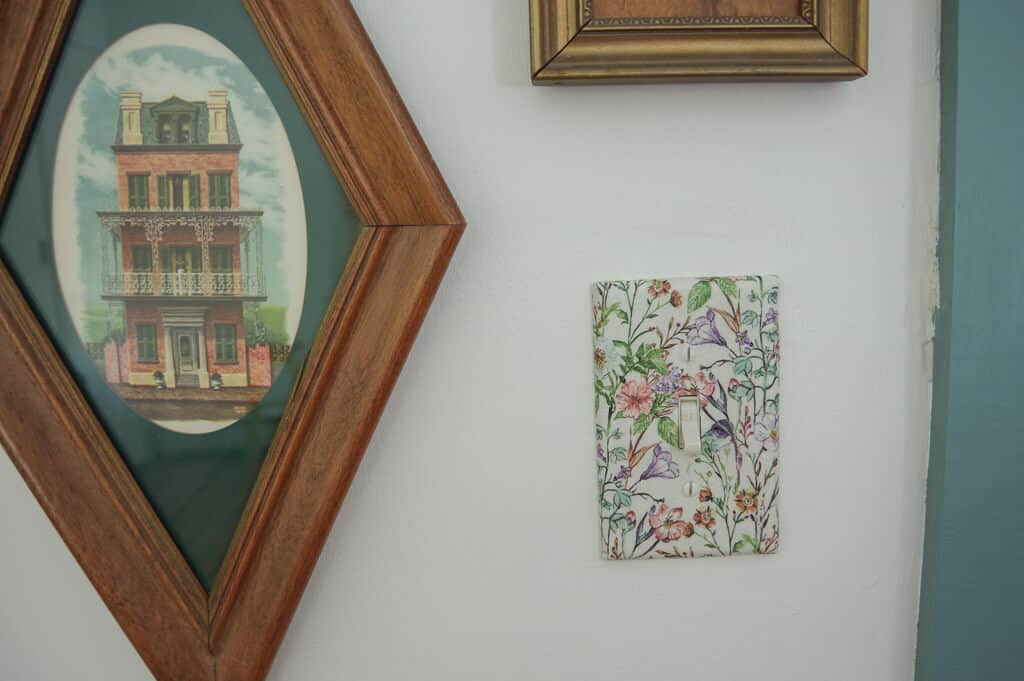
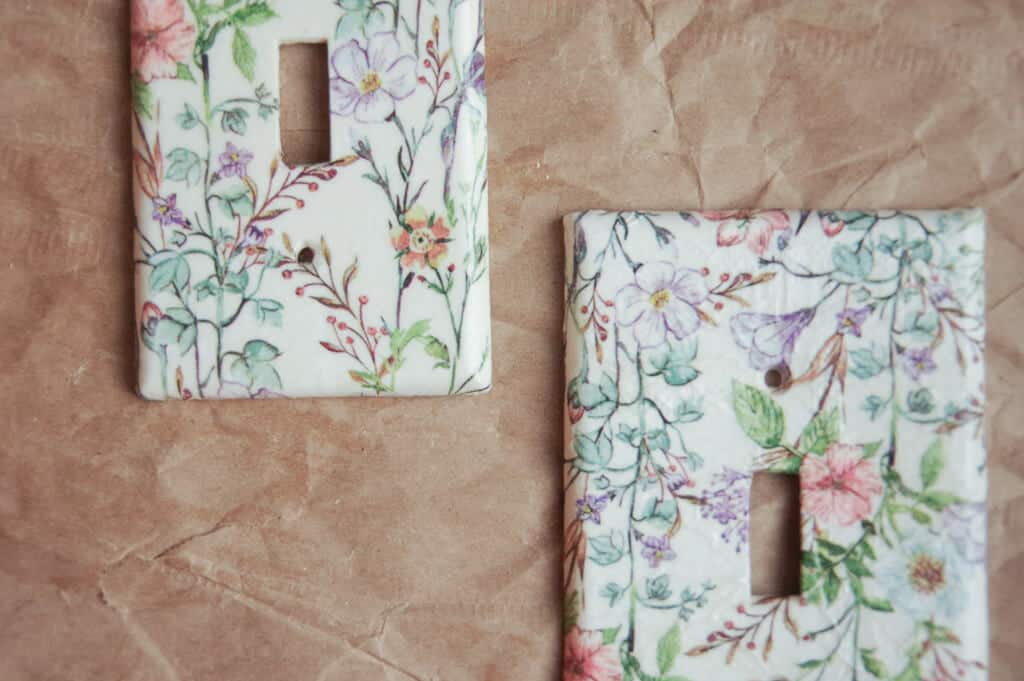
How to Make a Decorative Light Switch Plate

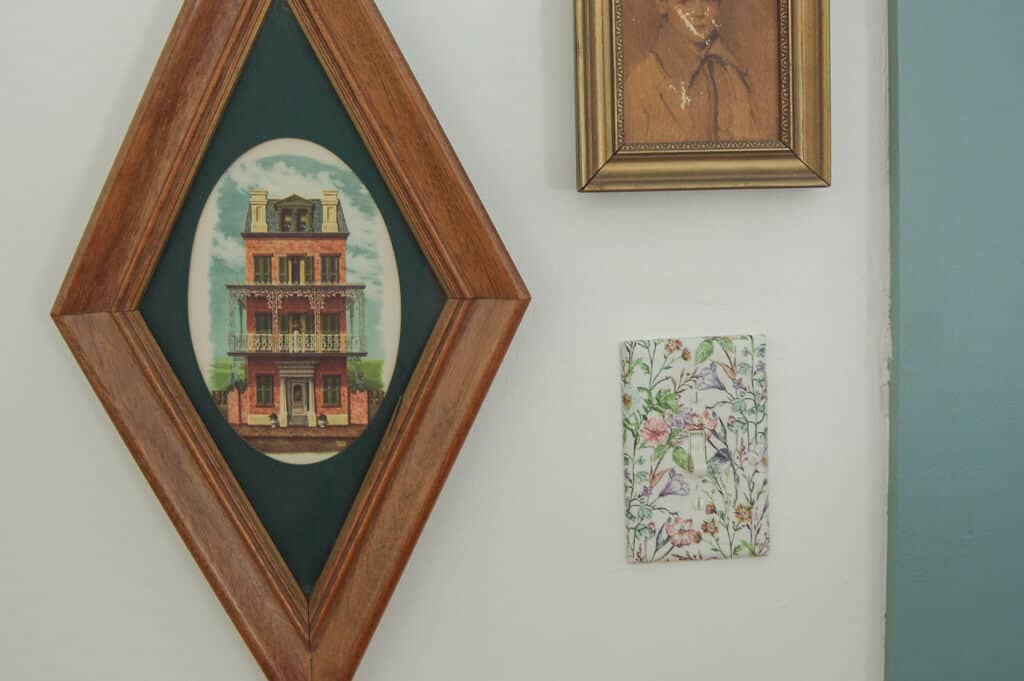
If you love the Anthropologie home aesthetic, this simple diy is for you. With cottage maximalist vibes, this step-by-step light switch cover tutorial will bring charm to any space!
This post contains affiliate links. As an Amazon Affiliate, I may earn a small commission on qualifying purchases at no extra cost to you.
Materials and Tools Needed
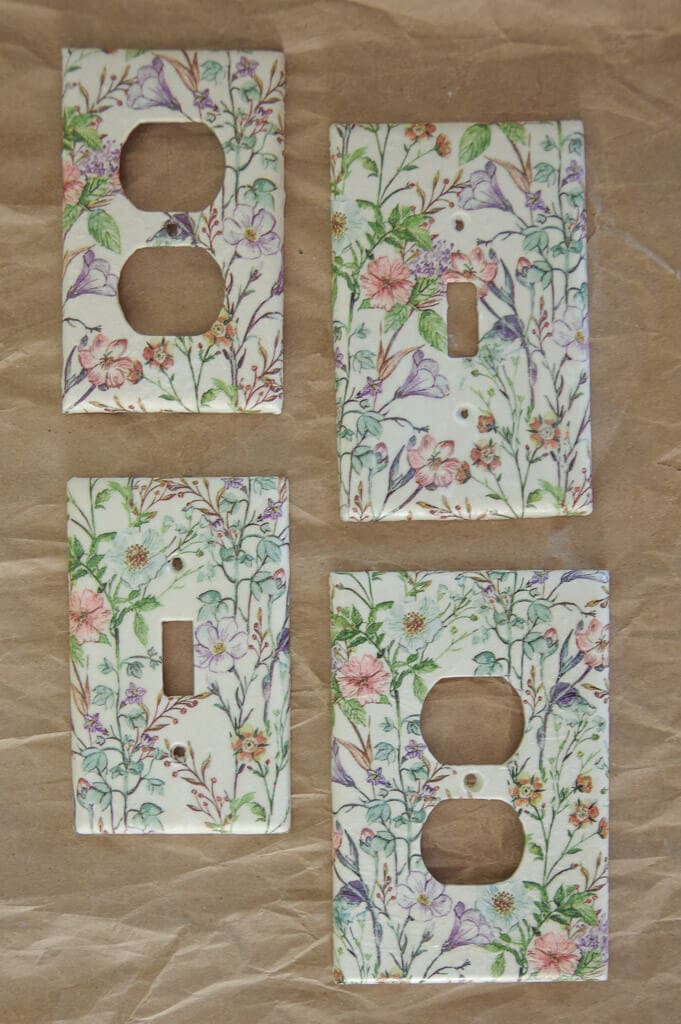
Light Switch Plate or Electrical Outlet Cover (you likely already have them in your home! If you want to purchase one, a cheap plastic one works great! Also, you could consider a Jumbo size light switch plate – see notes below)
Patterned Napkin (I purchased mine at my local TJ Maxx, but this set from Amazon looks like a cute option if you are looking online)
Mod Podge (I used the satin sheen, but any sheen will work)
Paintbrush (one of my favorite craft brushes is a 3/4 inch wide flat brush, similar to the one in this set)
Scissors
Embroidery scissors and sewing pin (optional, but nice for the more detailed cuts)
Instructions
But First, a Couple of Notes
When choosing a light switch plate, as I mentioned above, a regular cheap light switch plate works great! Another option to consider would be a jumbo size light switch plate which is just a slightly larger size than the traditional ones. You can see in the photo below an example of both.
Keep in mind to handle the napkins gently to avoid tearing once they are wet with mod podge.
This process can also be done on an electrical outlet cover (and in fact I highly recommend it as it’s just too cute).
And lastly, if you love a good cottage aesthetic, make sure to check out my gathered lampshade tutorial!
Prep Napkin
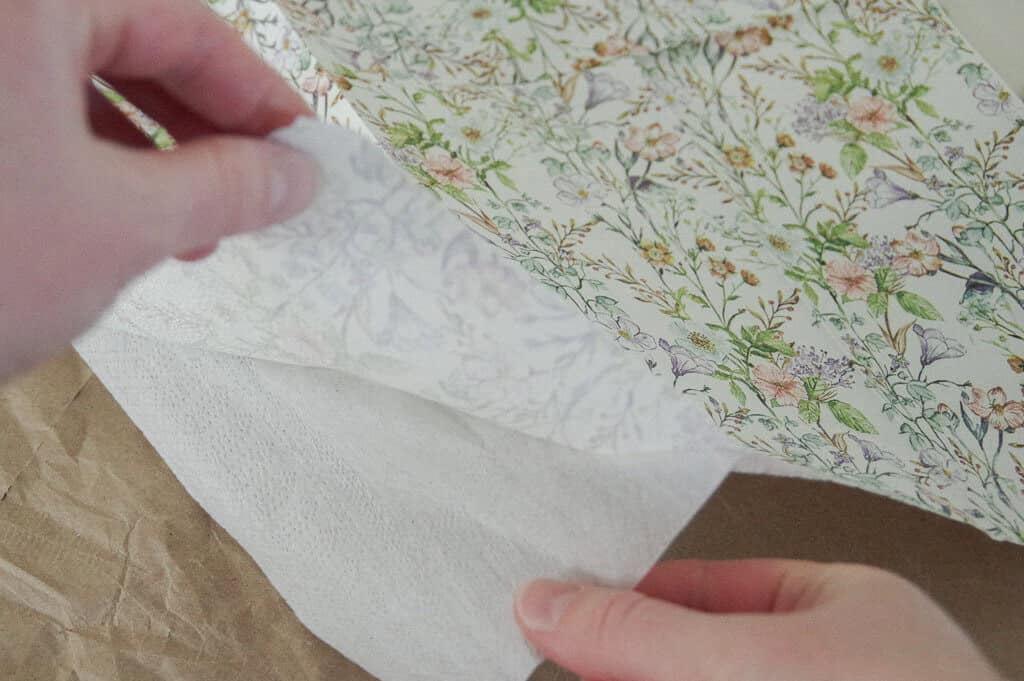
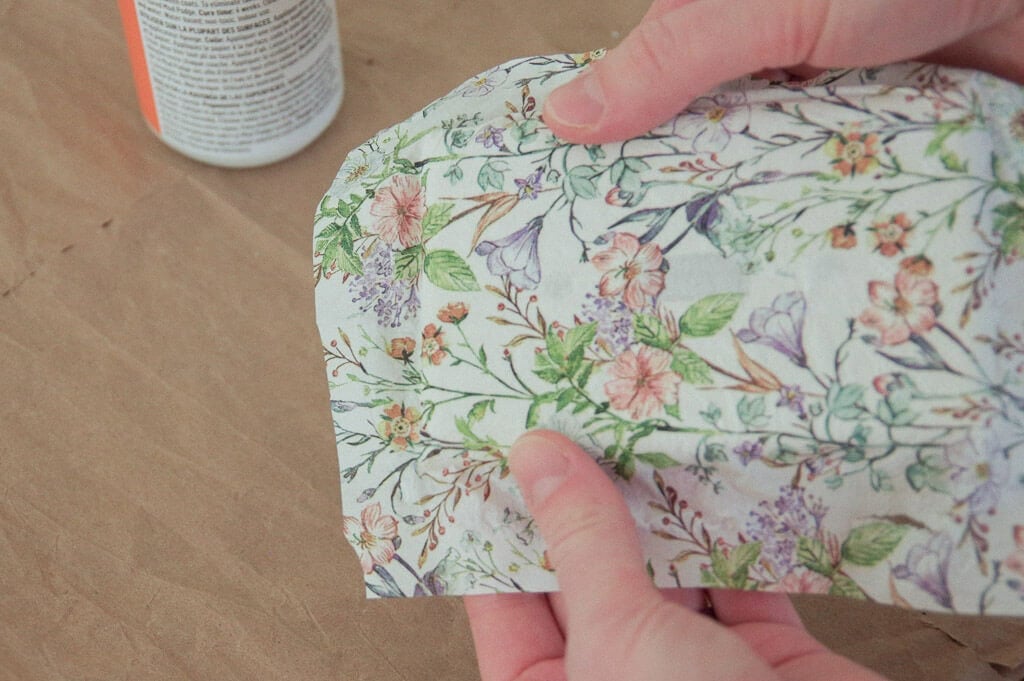
Most, if not all, decorative napkins have two layers to them. For this project you will want the top printed layer only. Starting in one corner, find and separate the two layers. Set aside.
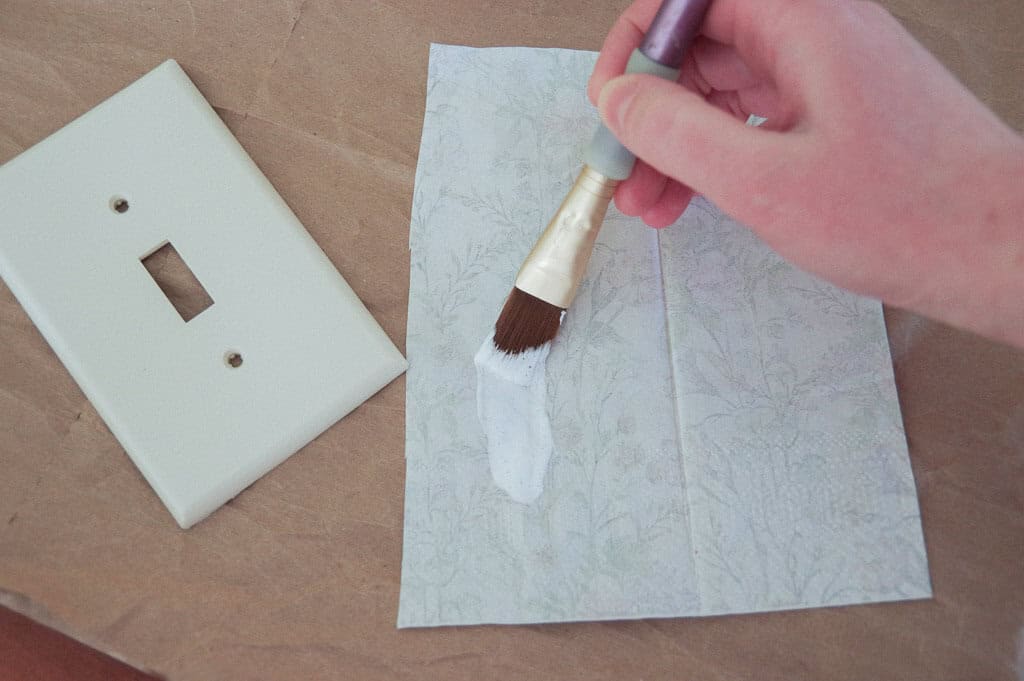
Cut a portion of the napkin that will cover the light switch plate, plus an inch or so on all four sides. This does not need to be exact. You just want to make sure to have extra paper to fold onto the back side.
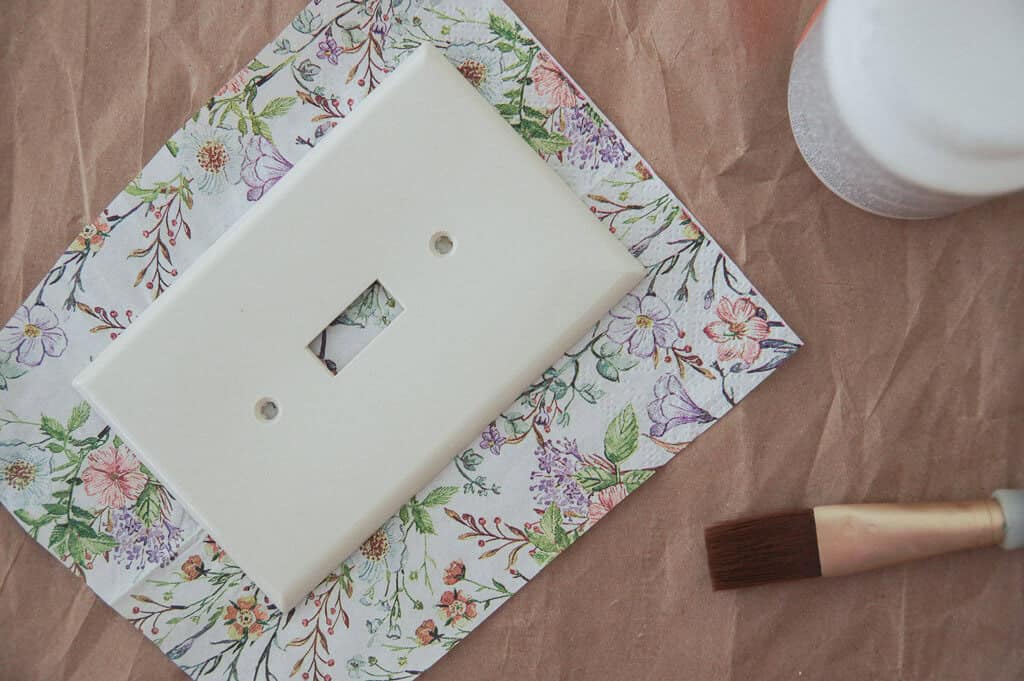
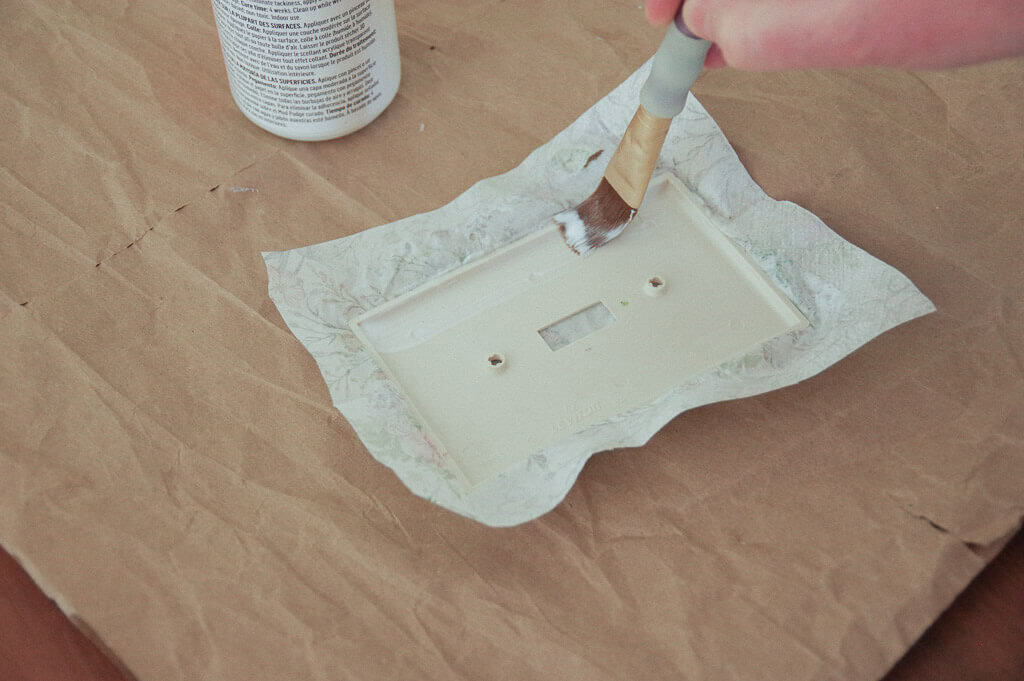
Place the napkin with the printed side facing down. Brush a generous layer of mod podge onto the back side of the napkin leaving the outer 1/2 inch (give or take) of the napkin free of glue. Let it soak for 30 to 60 seconds before moving to the next step. You may notice that the portion of the napkin with the mod podge has expanded leaving the dry edges with a stretched appearance. This is why it’s important to cover the entire area that will be over the front of the light switch plate with mod podge first – to avoid the stretches on the front of the light switch plate, thus giving you a smoother finish.
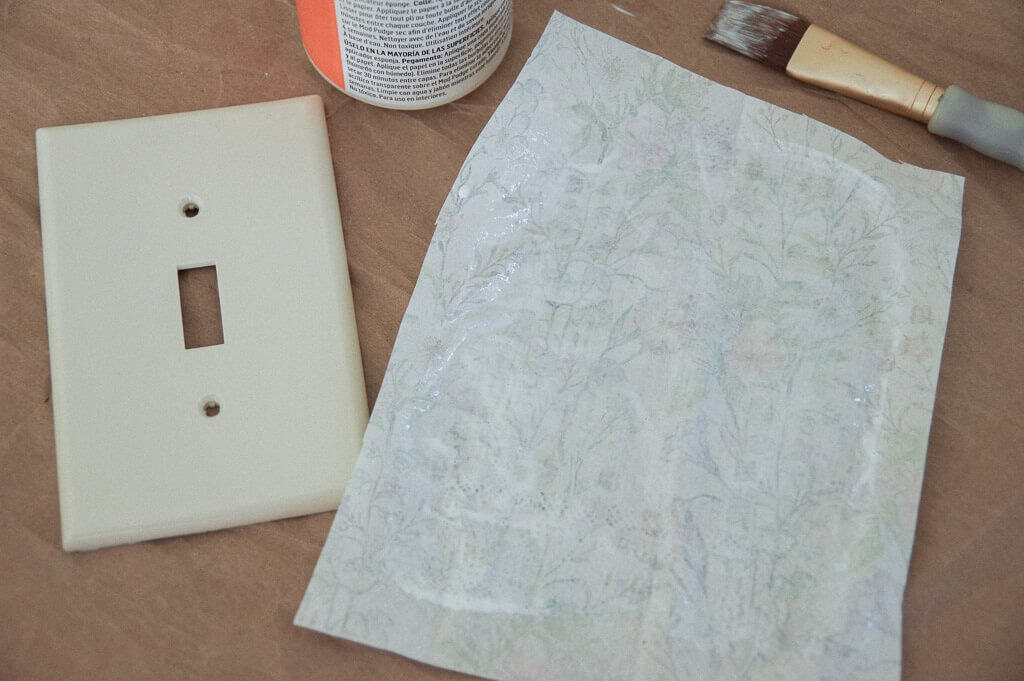
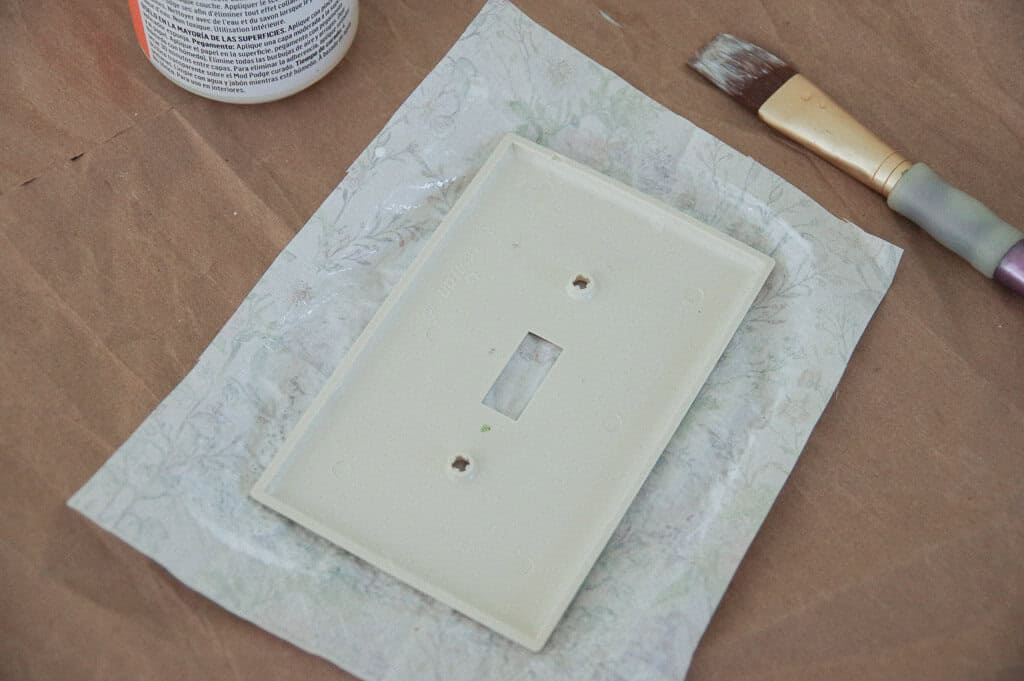
Glue the Napkin to the Light Switch Plate
Place the light switch plate face down directly onto the glue. Flip over and gently smooth out the napkin with your fingers. Try different techniques – gently pulling, pressing, or whatever works. Make sure you’re paying attention to the sides as well. It may take a couple minutes to get the napkin how you want it, but taking the extra bit of time to “mess” with it will be worth it.
Wait to cut the holes for the light switch and screws until after gluing the back.
In the photo below you may notice the light switch plate on the right is wrinkled while the one on the left is smooth. This is why it’s important to:
1. Wet the entire area of the napkin that will be over the front of the light switch plate, and
2. Take time to gently smooth out the napkin once it is on the light switch plate.
Glue the Back Side
Once the top is set how you want it, carefully flip the light switch plate over. Trim excess paper as needed. Apply a layer of mod podge on the edges and corners of the back of the plate. Fold the excess paper down and cover with another layer of mod podge.
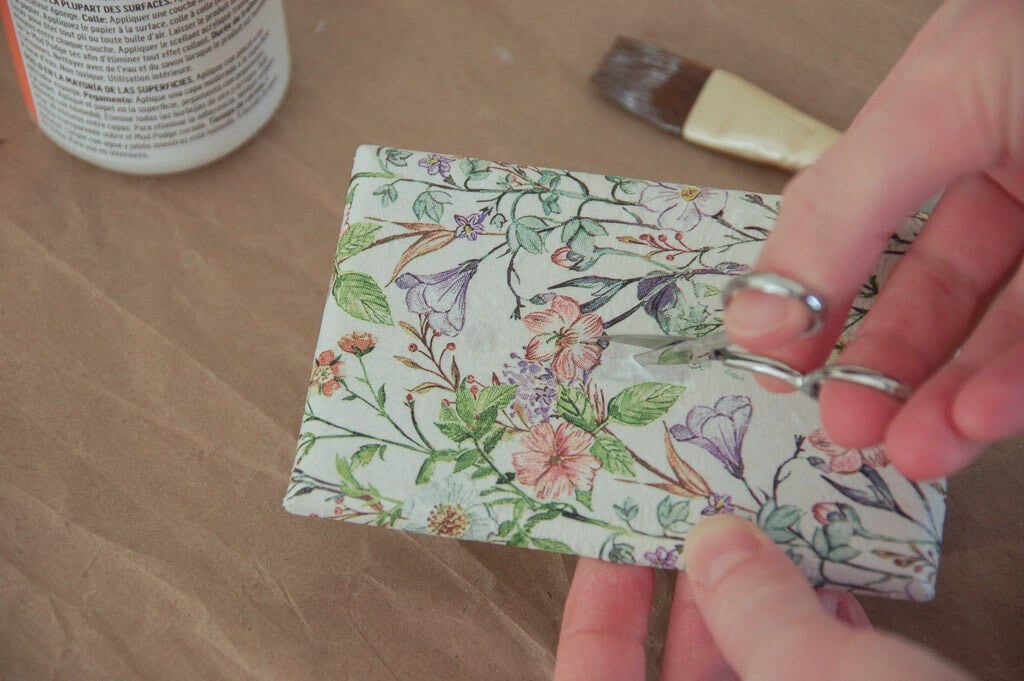
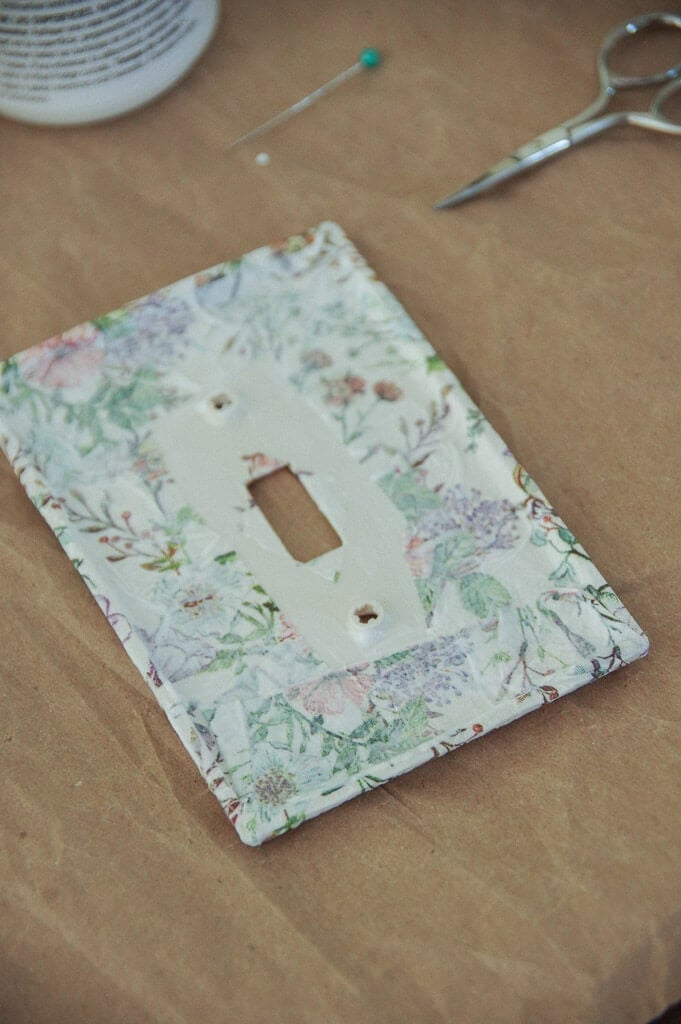
Cut the Holes for the Light Switch and Screws
Taking a small set of scissors, cut an “x” shape in the rectangular hole for the light switch. If covering an electrical outlet, do this step for the large electrical outlet holes. Flip the light switch plate over to the back again and paste those little sections down. Refer to the photos below if needed.
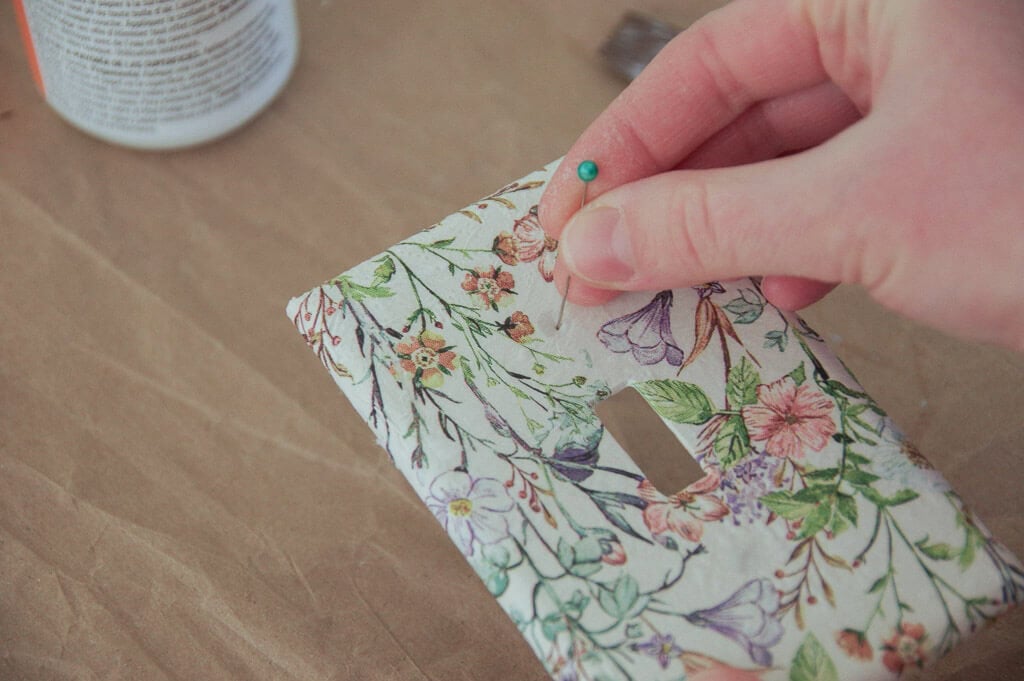
For the holes where the screws go, I found that it worked perfectly to use a sewing pin with a round head. I poked a hole into the paper with the pin side, then just pushed the rest of the pin through. It was the perfect size to make the hole I needed without pulling the paper too much. Make sure to do this before the paper dries completely (or add a little mod podge and let it rehydrate a little before punching the hole).
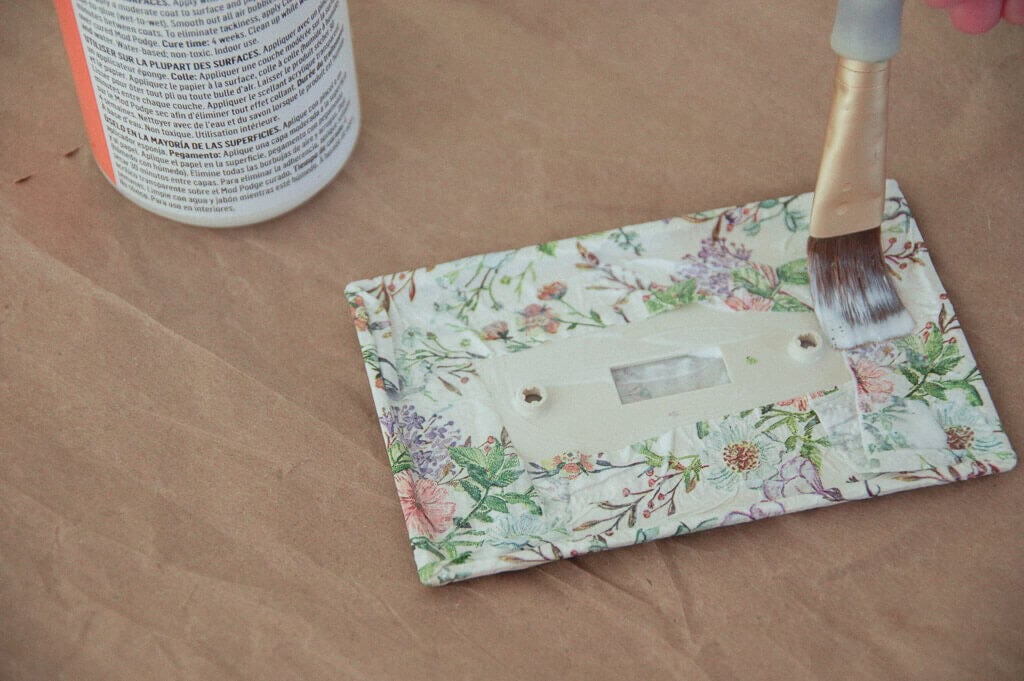
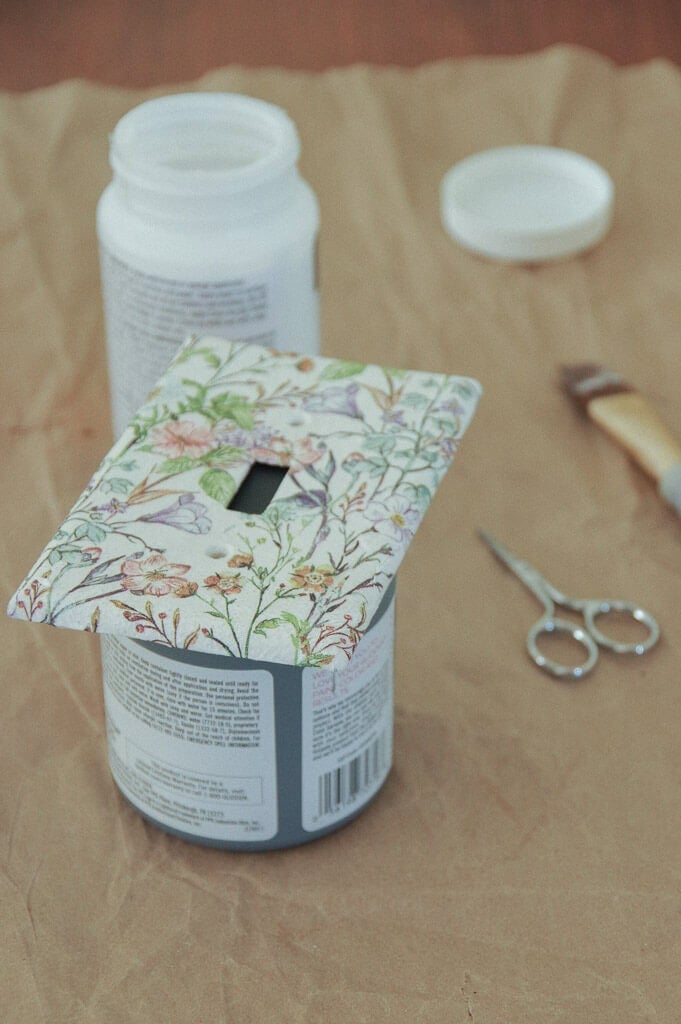
Add a Couple Coats of Mod Podge for Protection
Add a coat of mod podge to the top of the light switch plate. Dry on an elevated surface to avoid sticking to the table or paper underneath.
Dry completely and apply at least one more layer. I would recommend 2-4 coats of mod podge in total.
Affix the Light Switch Plate to the Wall
The last and most exciting part – affix the light switch plate back onto the wall and enjoy it every time you turn the light on!
If you enjoyed this tutorial, I’d love to know! You can comment below or tag me on Instagram @sweetmeadowfarmhouse
Ever Warmly, Ashlei