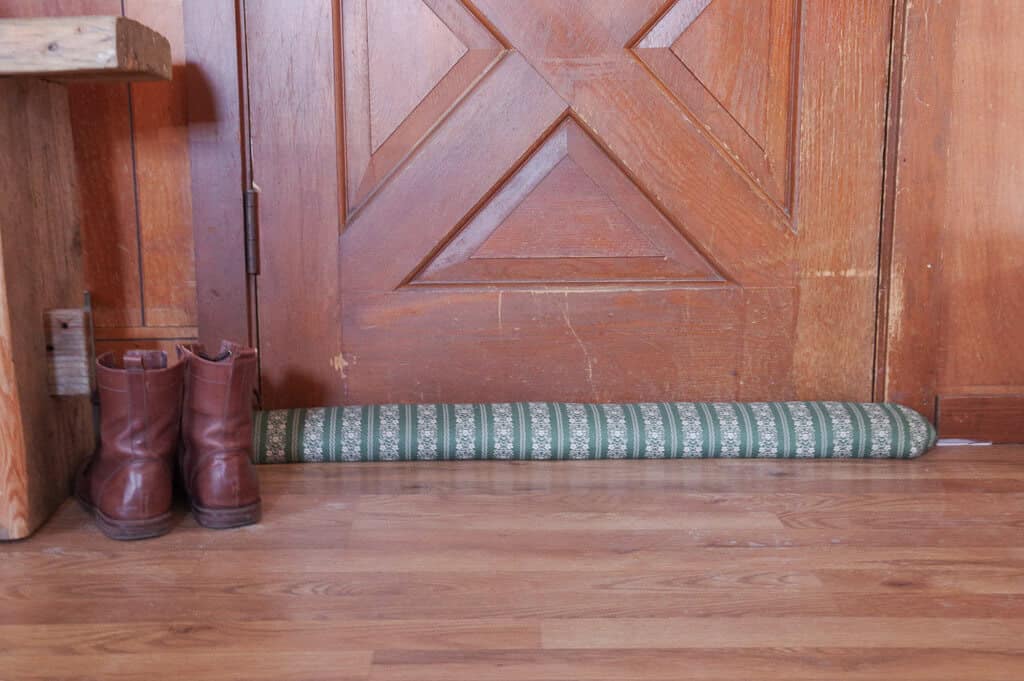
How to Make a Draft Stopper

Follow this step by step tutorial for a DIY Draft Stopper to keep you warm and cozy in the cold winter months. With just a few simple supplies and about 30 minutes you can whip up this project and keep the cold air at bay.
This post contains affiliate links. As an Amazon Affiliate, I may earn a small commission on qualifying purchases at no extra cost to you.
Materials and Tools Needed
1/4 yard fabric (this will do for a regular single door, however, if you want to do a double set of doors, you will need more)
Coordinating thread
10 lb bag of cheap rice – this will give you the 16-18 cups of rice needed to fill the draft stopper (or, if you prefer, you could opt for plastic pellets which can be likely be found on Amazon). We wanted something without plastic and the rice has worked well thus far as the weight keeps it in place and it’s quite cheap. We haven’t had any problems with it getting too wet.
Sewing machine
Tape Measure
Fabric scissors (or a Rotary Cutter Set – very nice for cutting long, straight lines)
Sewing Gauge (optional, but one of my most used tools and so affordable)
Tailor’s chalk (optional, but if you haven’t tried these for marking fabric, I highly recommend)
Canning Funnel (optional as well but helpful for filling the stopper with rice.You can likely find these at your local grocery or dollar store. This metal one is a similar size to the one I have which worked great)
Instructions
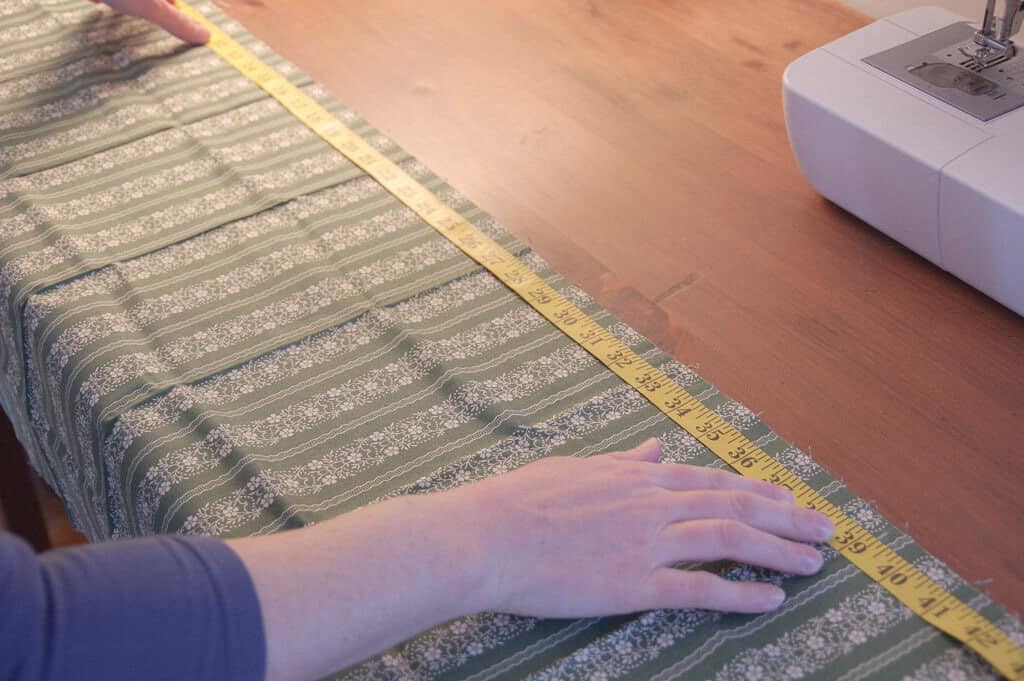
Measure Door
Measure the width door that you would like to make the draft stopper for and add one inch. This length will vary slightly depending on your door and on how long you want your draft stopper to be.
I measured from the outer edge of the trim on either side of the door so that the draft stopper would extend a little beyond the actual door on both sides. My measurement (both trim boards and the door) was 38 inches and I then added on inch for seam allowance thus bringing my measurement to 39 inches.
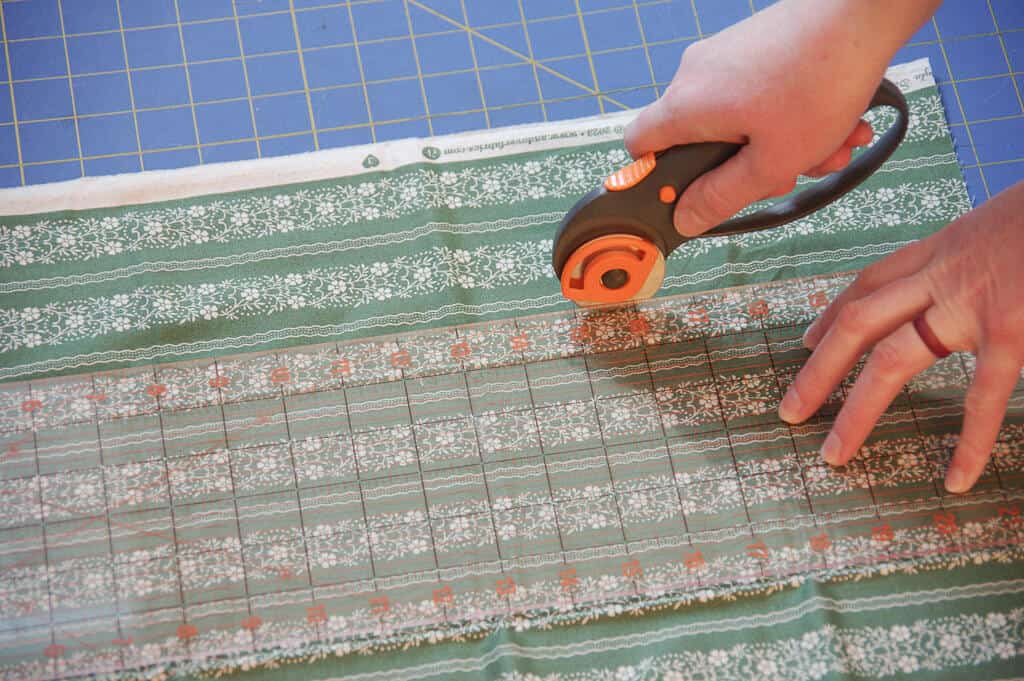
Mark and Cut Fabric
Before cutting, make sure your fabric is washed and ironed.
Take your fabric and mark out the section you want to cut. For the length, use the measurement from the previous step (your door plus 1 inch for seam allowance) and the width will be 11 inches. So, for example, I cut a piece of fabric that was 39 inches long by 11 inches wide. You can mark and cut with scissors, or you can use a rotary cutter and mat set, which is very simple and convenient.
Sew Seams
The seam allowance for this project will be 1/2 inch.
Fold the fabric in half length-wise with the right sides together. It should be one long, folded piece of fabric.
Starting on one of the short sides of the fabric, sew a 1/2 inch seam, making sure to backstitch at the end and the beginning.
Starting on the long side, sew 6-8 inches and then backstitch. Skip a 4 inch section of fabric then start the seam again, backstitching to lock the seam in place (this is where you will fill the draft stopper with rice later on). Continue the seam all the way to the end of the long edge and backstitch in place.
Sew the remaining short end with a 1/2 inch seam.


Sew Corners
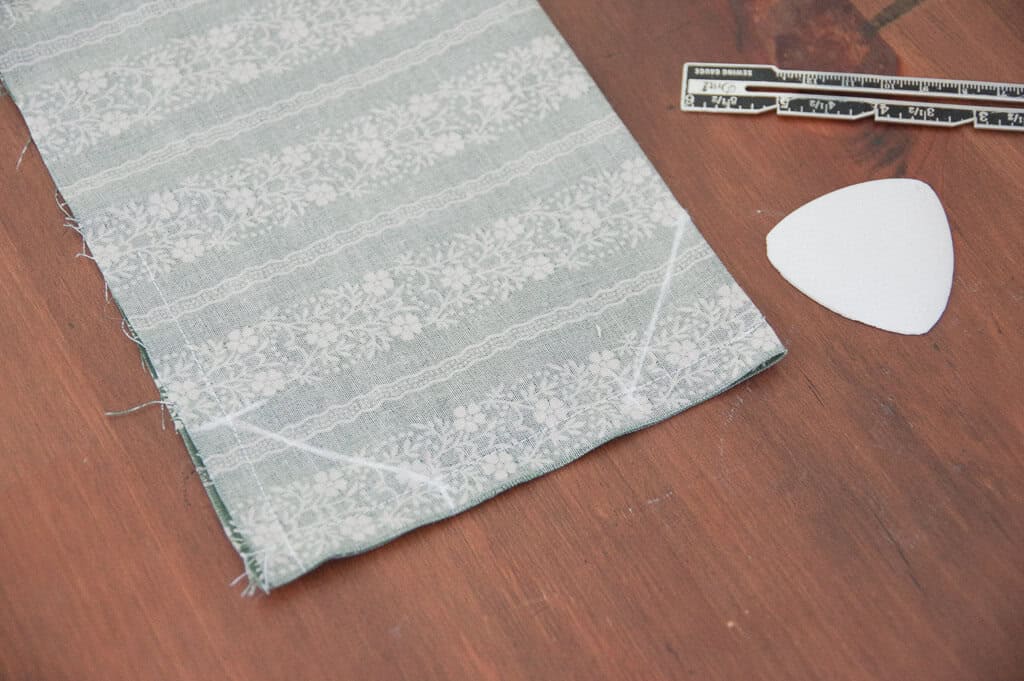
Next, to give the ends a bit more of a finished look, I chose to sew little triangles into the corners (see photos below for reference). You can opt out of this, however you may need a little more rice to fill out your draft stopper.
Start by measuring and marking 1 1/2 inches from the seams in the corners. Start at the seam, not the edge of the fabric, in all cases except the folded edge of your fabric. In each corner, draw a line from one mark to the mark on the seam perpendicular to itself. This will create little triangles in each of the corners.


Sew along the line (from mark to mark), backstitching at the beginning and the end. Complete with all 4 corners. You can trim these if you’d like, however I left mine and it’s completely unnoticeable.
Fill with Rice
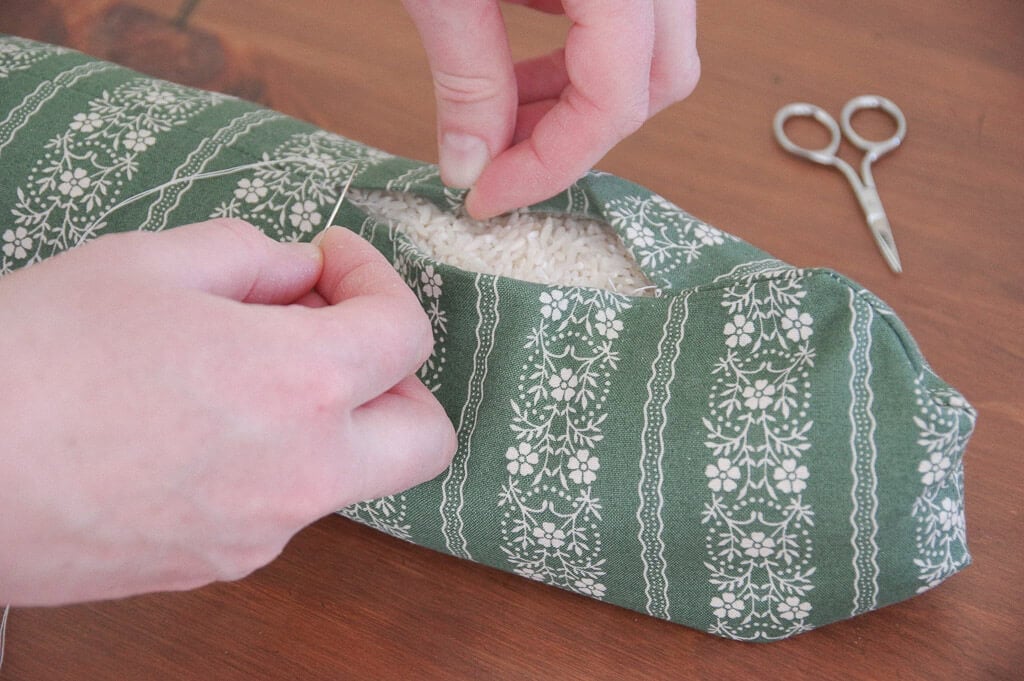
Turn the draft stopper right side out through the 4 inch opening on the long side.
Fill with rice until desired fullness. I filled my draft stopper with about 17 cups. The canning funnel was very helpful in this process, but again, it is certainly not necessary.


Hand Stitch Seam
Carefully hand stitch the 4 inch seam. I used a ladder stitch (this is a good tutorial if you’re unfamiliar with it) to hide the stitching, but you can use whatever stitch works best for you. Make sure to double or triple knot the thread at the end so it stays secure.
You’re all done!
We have had ours in place for several weeks now in the height of winter and they are holding up quite well. I will likely scrub them down with a damp cloth at the end of the winter, but for now I’m enjoying the cottage charm they bring in such a practical way.
If you enjoyed this tutorial, I’d love to know! You can comment below or tag me on Instagram @sweetmeadowfarmhouse
Ever Warmly, Ashlei