
How to Make a Gathered Lampshade
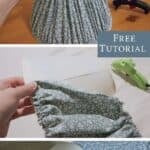
Follow along with this step-by step tutorial to makeover an old lampshade into a gathered lampshade perfect for adding cottage charm to your home!
Do you ever see something in store which perfectly fits your aesthetic and you know you have to 1) buy it or 2) recreate it. Well, several years ago I fell in love with a gorgeous Anthropologie lampshade. It was gathered fabric (exactly like this tutorial) in the sweetest dainty floral print. Thus my search for a gathered lampshade diy began….

Confession time…I have a lamp obsession. Oh, and frames, but that’s another tutorial for another day (or you can check it out right here). But seriously…I’ve picked up many-a-lamp at the thrift store. They’re not always pretty, but a little love and creativity can take an ugly lamp and transform it to fit your home and style.
Ever since I fell in love with the Anthro lampshade I mentioned earlier, I’ve been on the search for a tutorial for up-cycling an old lampshade into a gathered lampshade. There are many for pleated lampshades, but that wasn’t quite the look I was hoping for. So, after searching to no avail, I decided to make my own.
This diy ended up being less time consuming than I was expecting, which is always great news. It can easily be completed in 1-2 hours. So….grab a shabby lamp, some fabric, and let’s get started!
This post contains affiliate links. As an Amazon Affiliate, I may earn a small commission on qualifying purchases at no extra cost to you.
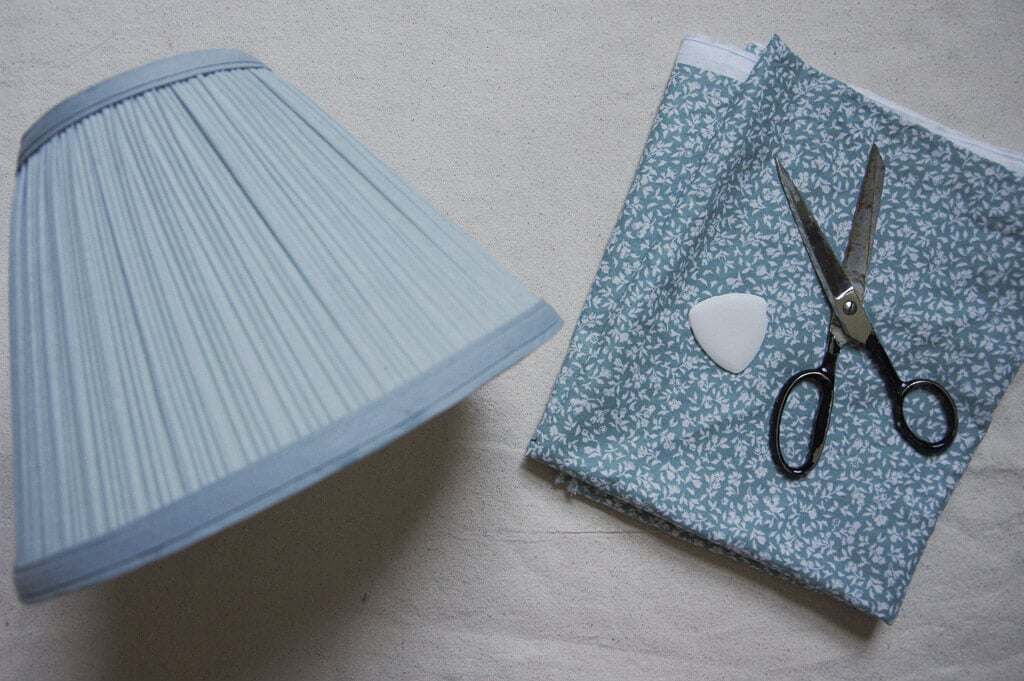
Materials and Tools Needed
A lampshade of your choosing
Fabric and matching thread (the precise amount of fabric needed depends on the size of your lampshade…see notes below)
Masking tape (not entirely necessary, but may be helpful. I used 1 inch wide masking tape)
Hot glue gun and glue sticks
Tailors Chalk (these are my favorite, but you really just need something to mark your fabric)
Fabric scissors
Sewing gauge (helpful but not necessary – you can check out all my sewing favorites in this post)
Iron and ironing board
Sewing machine
How much Fabric Do You Need?
1 yard of fabric is plenty for a small shade like in the photos. 1 yard would likely even be enough for a medium sized shade. However, if the shade is large, you will want 1.5 -2 yards of fabric. Keep in mind that the side angles of your lampshade will affect how much fabric is needed.
A Few Little Notes Before Starting
Please note that this tutorial is demonstrated on an A-line lampshade (narrower on top and wider on the bottom). If the lampshade you are working with has sides that are perpendicular to one another, just know that your traced fabric will be one long strip of fabric instead of a curved “U” shape as described in the tutorial.
The gathering in this tutorial is 2x the amount of fabric that is used to cover the shade. If you want more gathers, you will need to add more fabric, meaning you will want to trace the lampshade not just twice, but 2.5-3 times. This may be necessary if your lampshade has perpendicular sides.
Instructions
Prepare the Lampshade
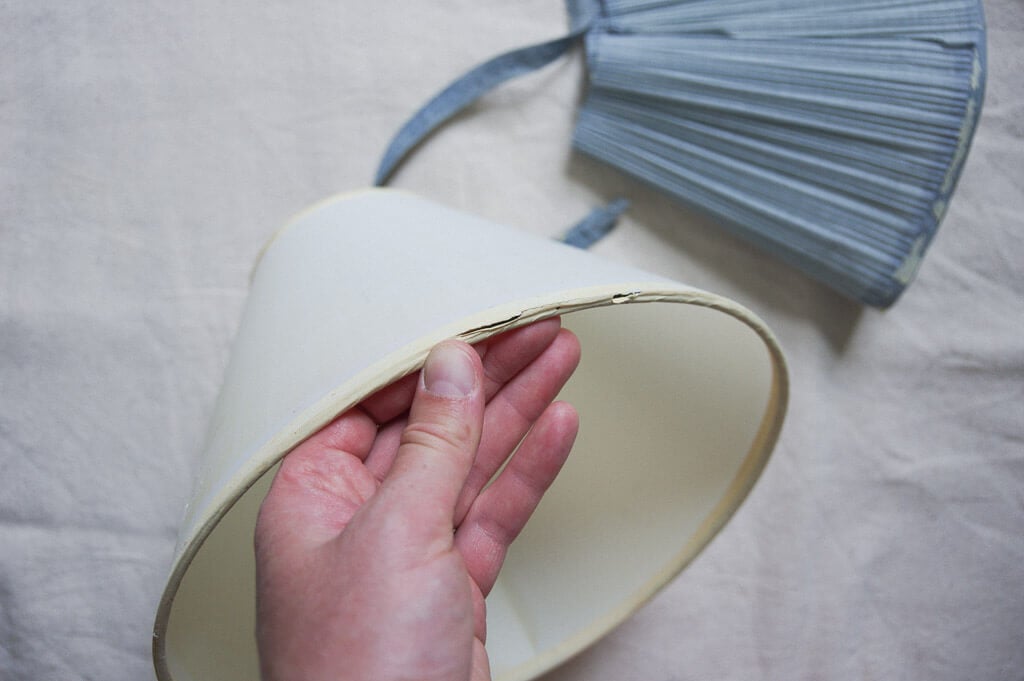
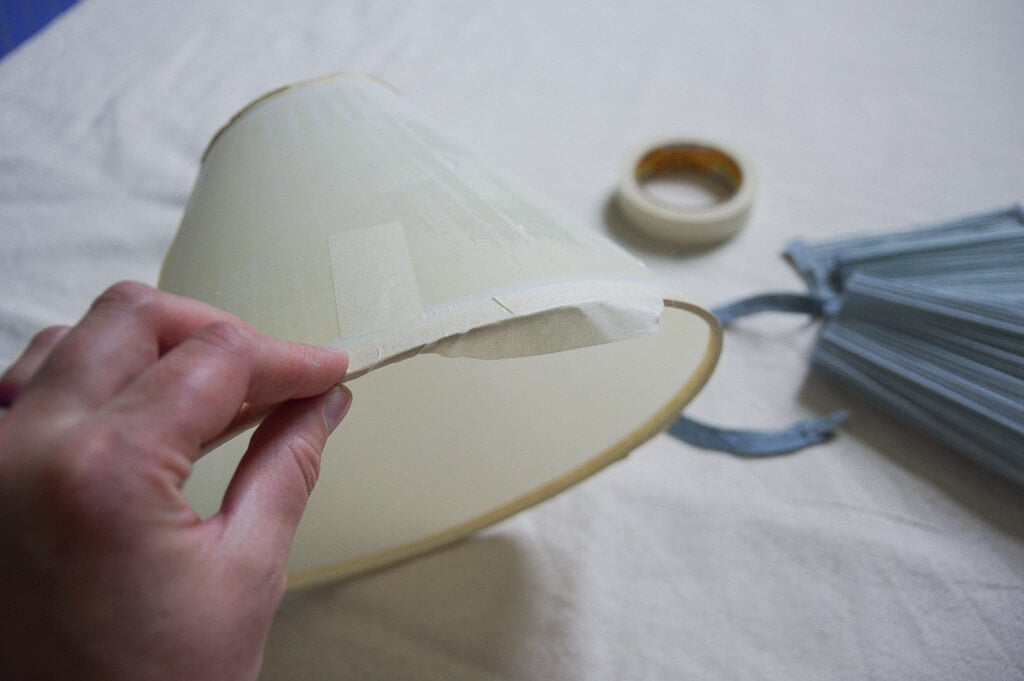
Depending on the construction of your lampshade this step may not be required or may look different. The goal is to get a good foundation for your project. It’s possible that I could have attached my new fabric directly over the existing blue fabric, but the gathers may have been visible when the lamp was lit. Therefore, I decided to remove it and attach my fabric directly to the vinyl shade.
If your lampshade is a metal-framed one without the vinyl you may have to attach the new fabric over the existing shade to give the fabric a good base.
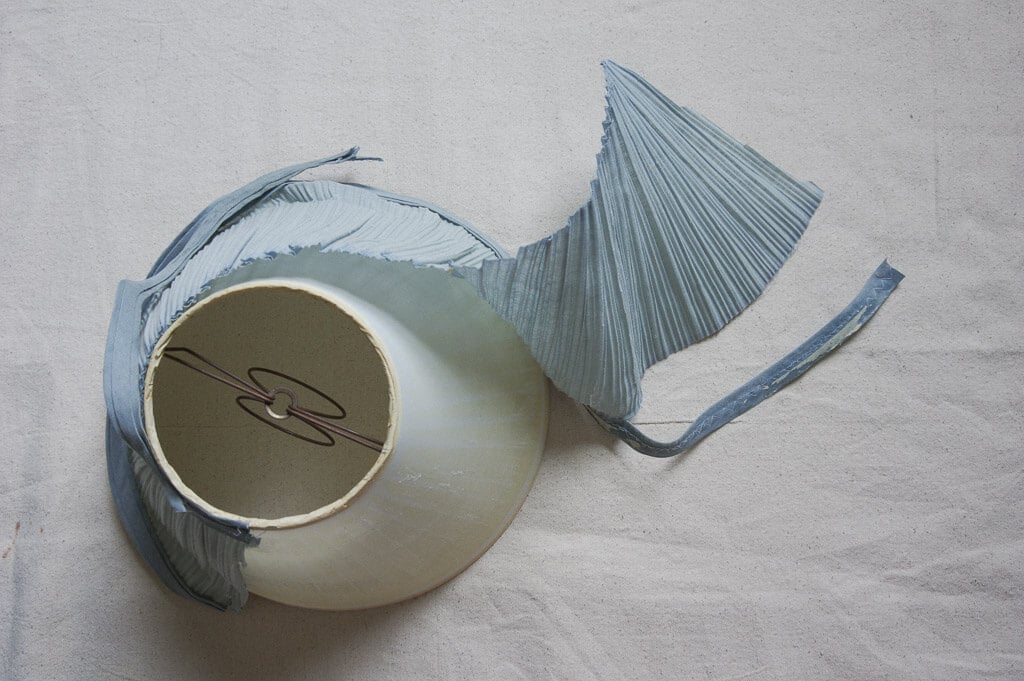
I had a small crack in the vinyl of my lampshade, which I repaired using 1 inch masking tape. Note that it is best to cut and not tear the tape for a smoother finish. I also reinforced the top and bottom edges of the lampshade frame with a layer of masking tape as a few spots cracked when I removed the original fabric.
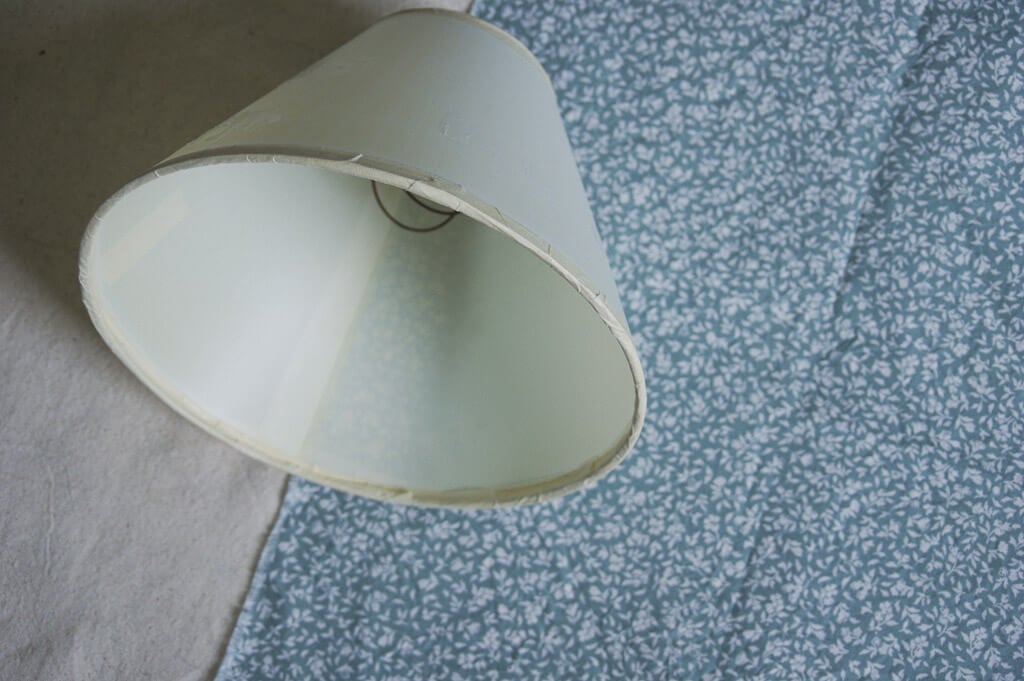
Trace and Cut Fabric
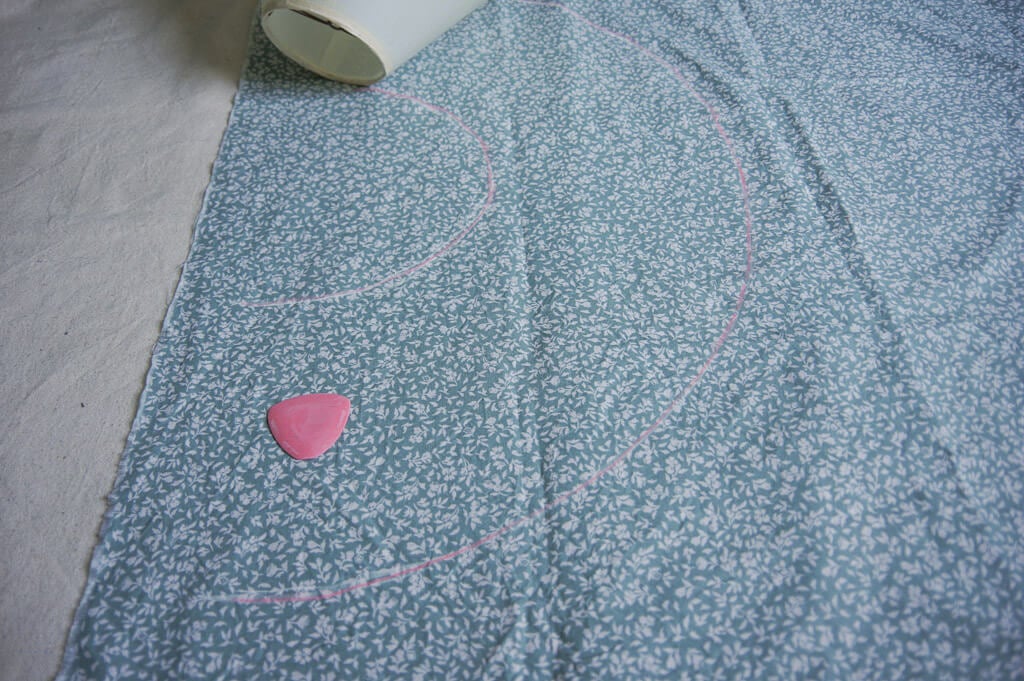
Place the lampshade on the edge of the fabric. In the photo below, you can see that I placed the seam of the lampshade on the edge of the fabric as a marker to know when I completed one full rotation of the lampshade.
Roll the lampshade on it’s side across the fabric, tracing along and stopping once you’ve completed a full rotation (you can see the arch shape it creates in the photo below). I would recommend rolling the lampshade another 2-4 inches to get a little extra fabric for seam allowance (you may need to start your rotation a couple inches in from the edge instead of at the raw edge to make sure you have space to roll a couple extra inches without rolling beyond the fabric).
When cutting out the fabric, I would recommend cutting on the outer edge of the marked line to give yourself a little wiggle room when adding gathers. I know it doesn’t add much, but it may be helpful.
Just as a reminder, I used and love this tailor’s chalk.
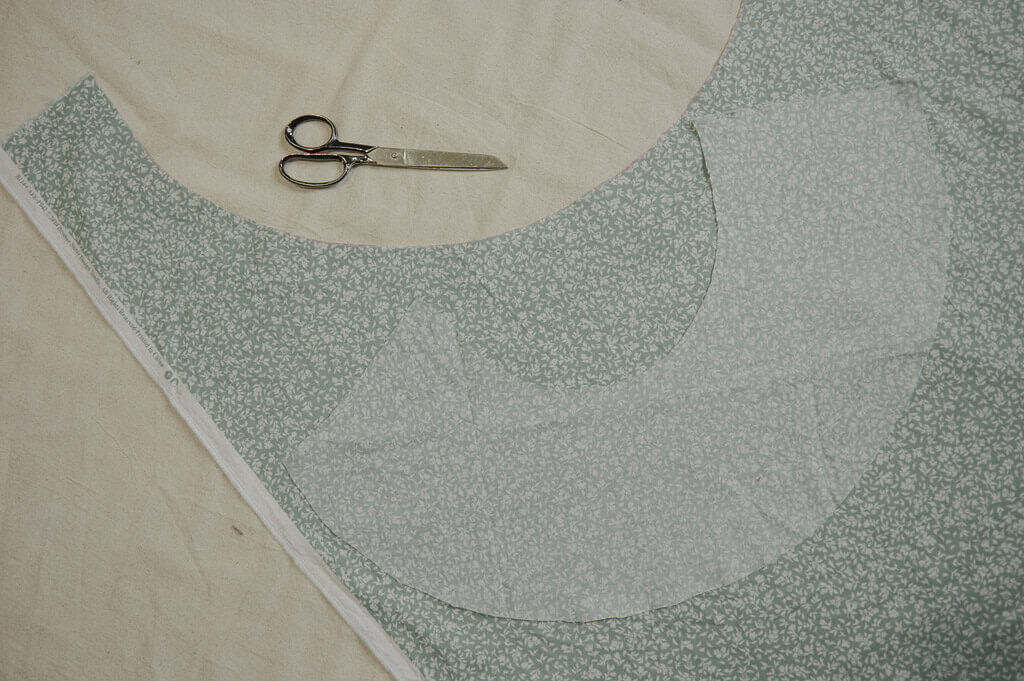
Next, cut a second piece of fabric using the first one as your template.
I mentioned this earlier, but wanted to mention it here as well…the gathering in this tutorial is 2x the amount of fabric that is used to cover the shade. If you want more gathers, you will need to add more fabric, meaning you will want to trace the lampshade not just twice, but 2.5-3 times (or more if you want lots of gathers).
Place the two cut pieces of fabric with printed sides together and sew along ONE of the straight edges to create a long, curved piece of fabric. Trim the seam allowance and iron flat.
You now have one large curved strip of fabric which makes a sort of circle shape. Next, iron the remaining two straight raw edges back 1/3 inch.

Create ‘Gathers’
There are several different methods for creating gathers in fabric. I typically use the long basting stitch method, which is what I used in this project. However, feel free to use whichever method you prefer.
So, for one gathered edge you will need to create two parallel basting stitches close to the edge of your fabric. I did mine at about 1/4 inch and the next one just under 1/2 inch. Make sure to backstitch each line at the beginning to lock the thread in. Do NOT backstitch at the end. In fact, you will want your thread tails to be generous (at least a couple of inches).
Do this for both the top and bottom curved edges.
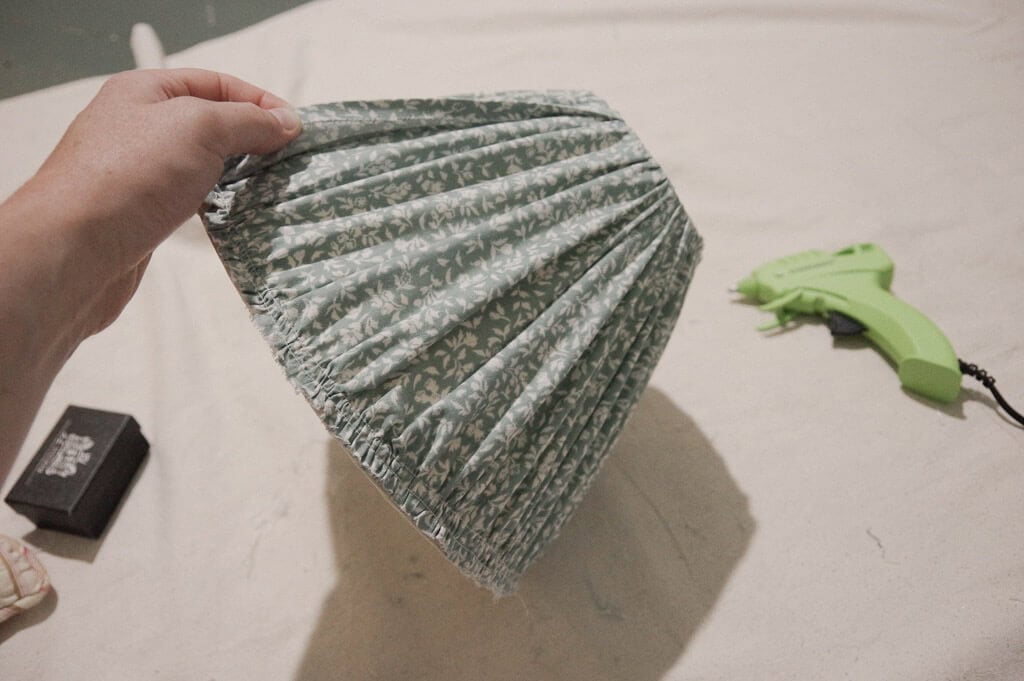
Now for the fun part! I would recommend starting with what will be the top edge of the lampshade. Take the two top threads and, leaving the bottom stitches, pull the top threads with one hand while using the other hand to create tension on the fabric, thus creating gathers (see photo below).
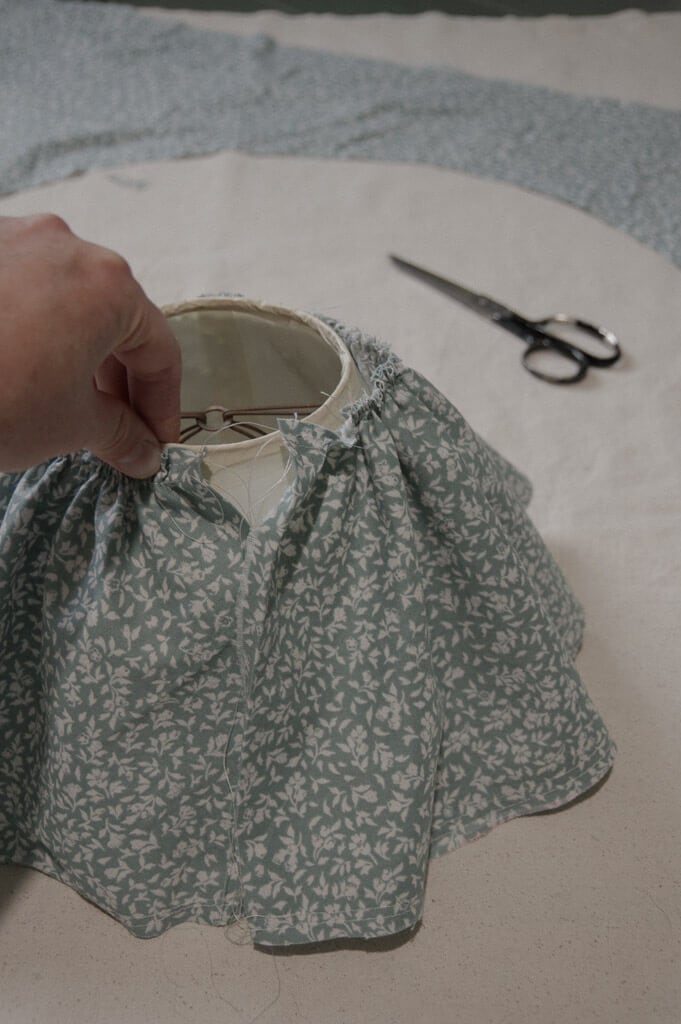
Continue this pulling/gathering process distributing the gathers across the length of the fabric as you go along until the fabric fits the lampshade snuggly with a slight overlap (you can see me testing this in the photo below). No need to worry about the gathers being perfectly distributed, that can be done later.
This part of the process is slightly tedious, but with a good podcast and coffee you’ll be finished before you know it.
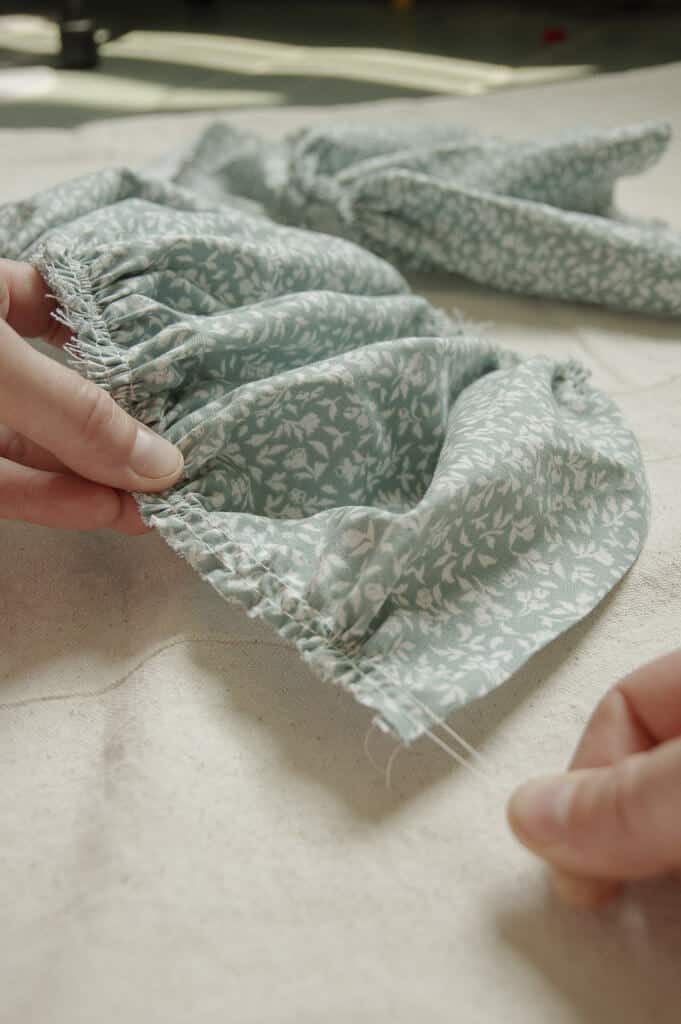
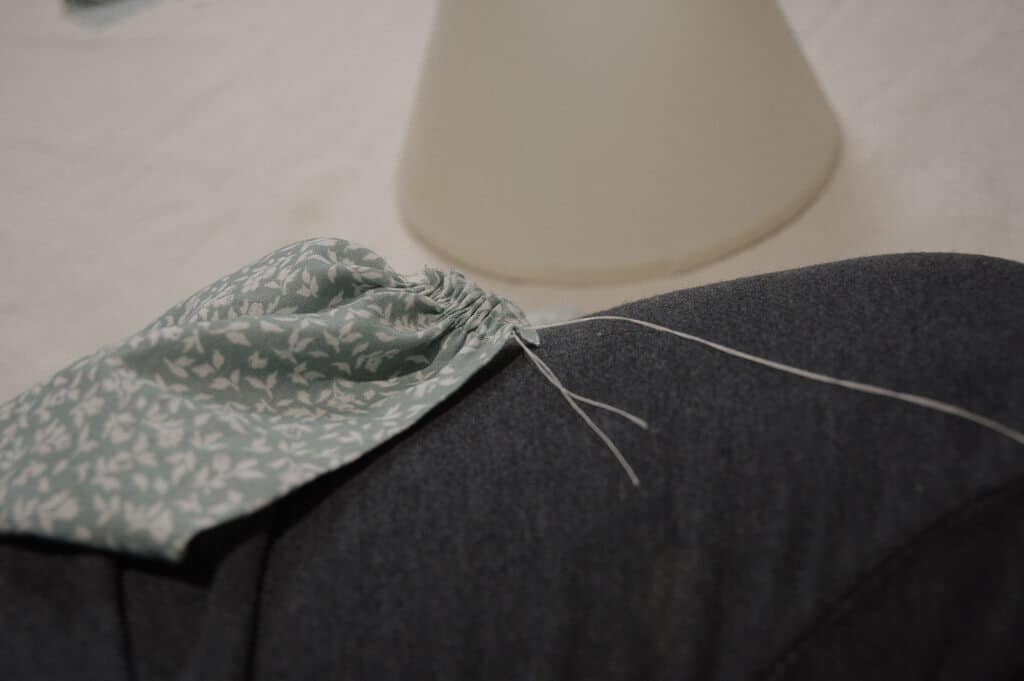
Once you have the fabric gathered to the correct width, trim and knot together the two threads you were pulling (see photo below-ignore the thread on the far right). This will allow you to distribute the gathers evenly within the correct width that you need for your lampshade.
Repeat the entire gathering process for the bottom edge of the fabric.
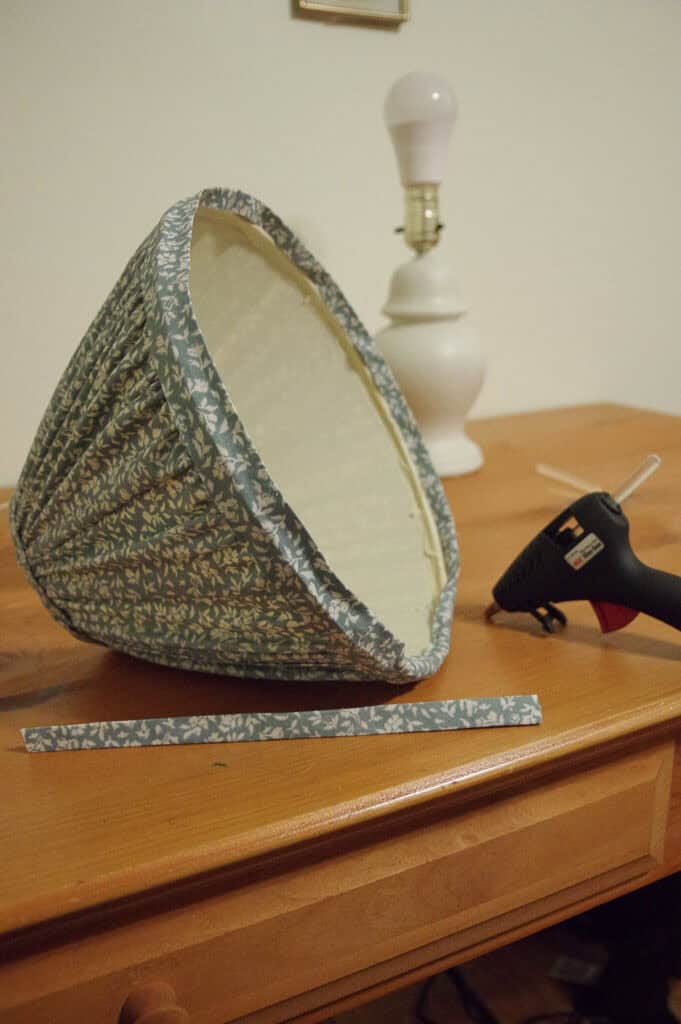
Attach Fabric to the Lampshade
Make sure the gathers are distributed evenly before gluing the fabric onto the lampshade (especially on the bottom edge as you will glue that edge down first…the top can then be adjusted accordingly). The gathers cannot be adjusted once glued.
Start by gluing down one of the straight edges at the back of the lampshade. This will give you a bit of a foundation to work from.
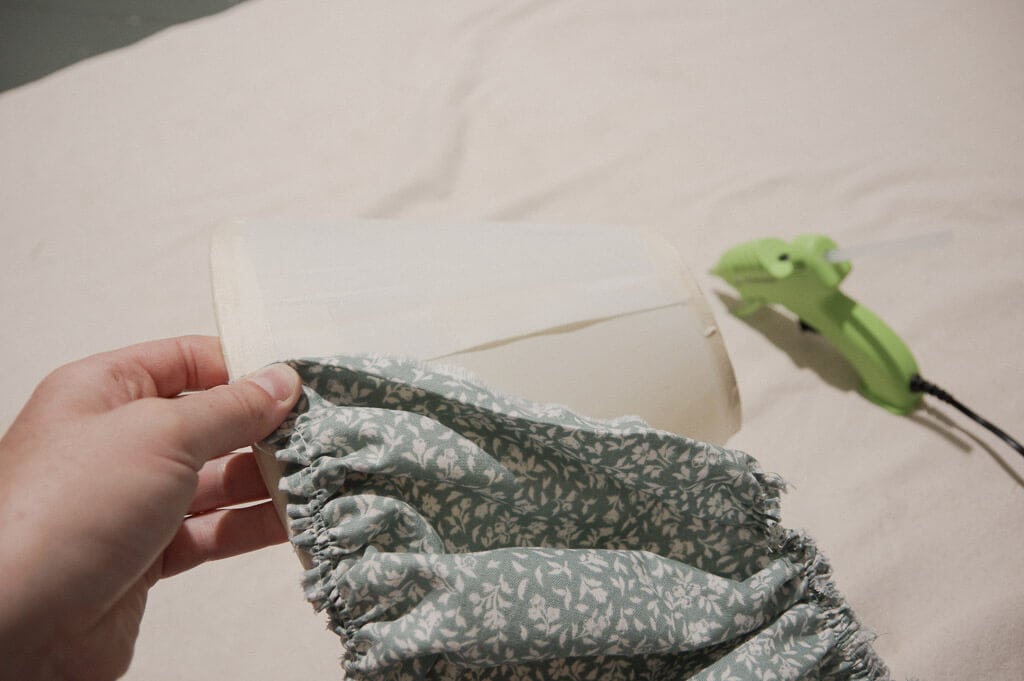
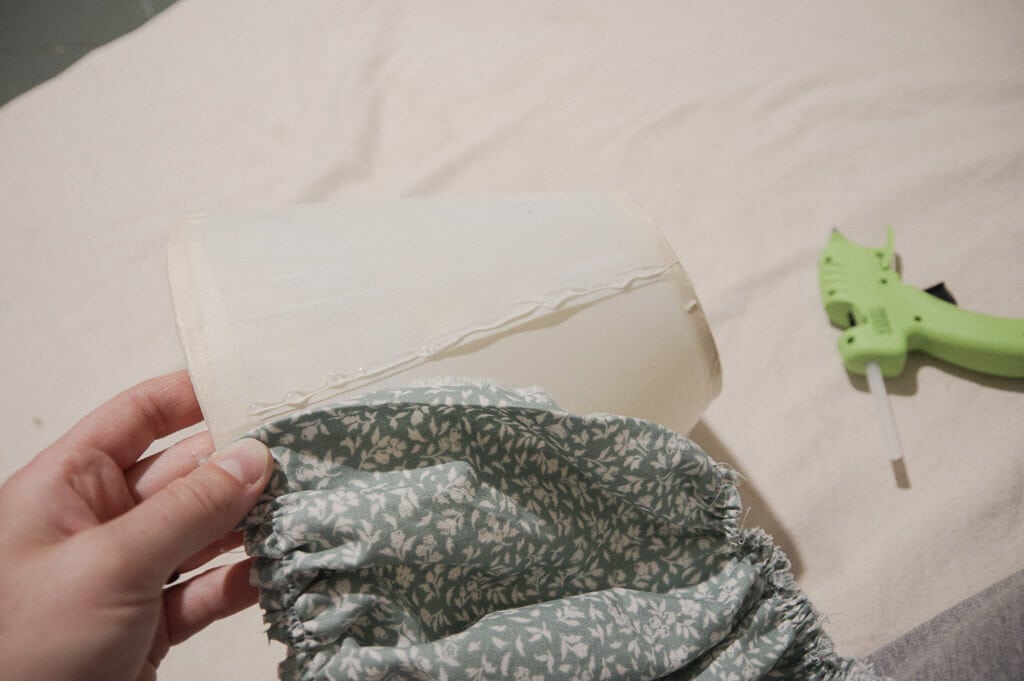
Work your way around the bottom edge of the lampshade. Apply about an inch or so of hot glue and then attach the fabric. Let each round of glue set before moving on.
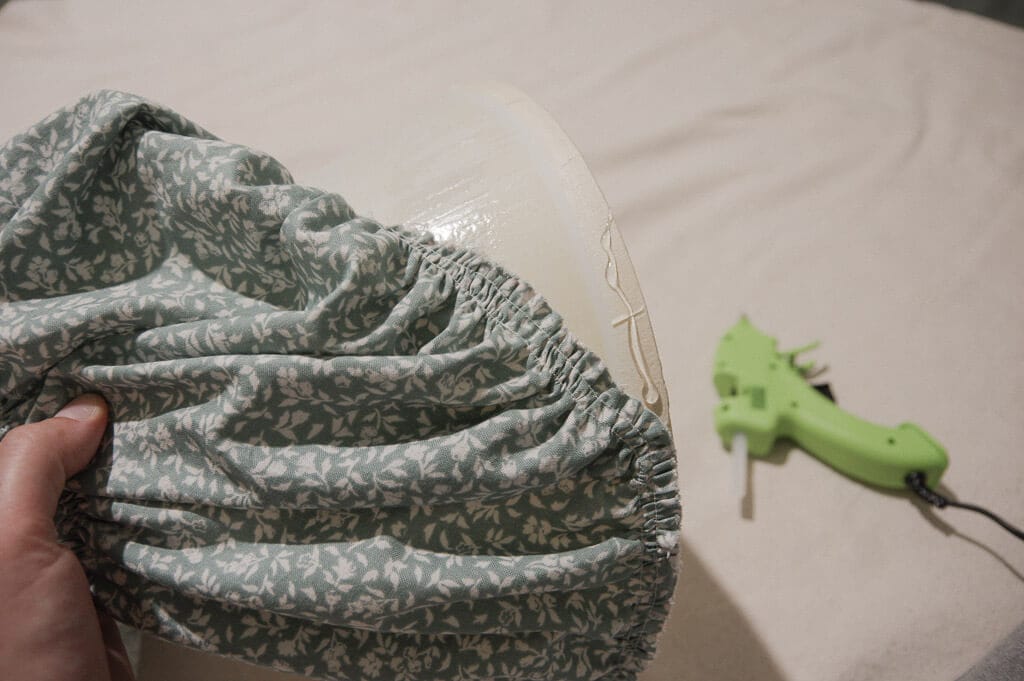
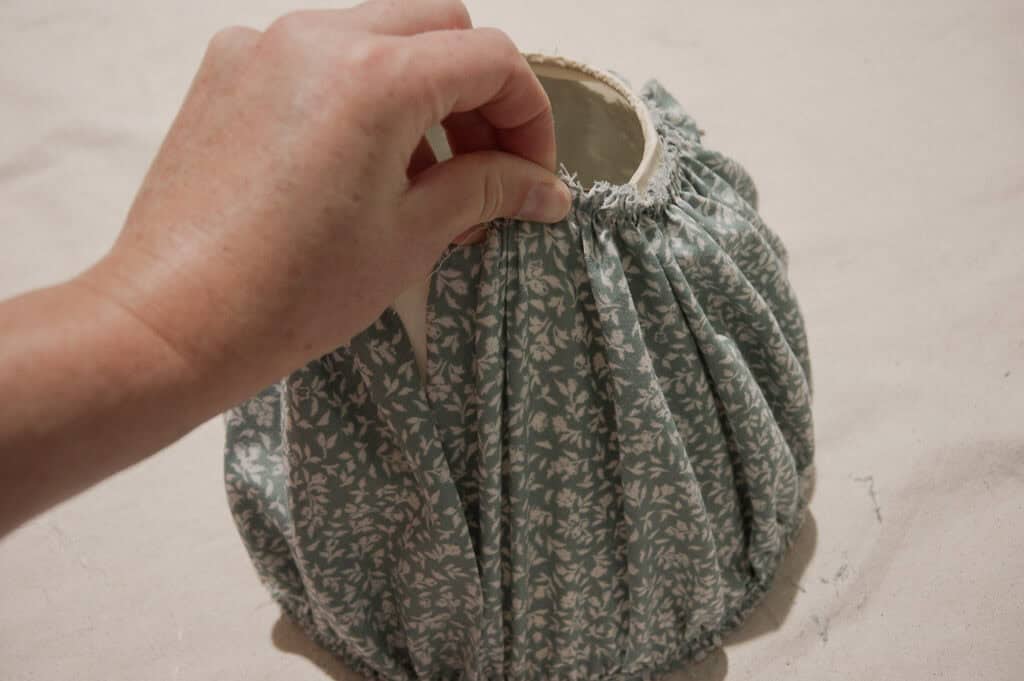
Once the bottom edge is glued on, make sure the top gathers are evenly distributed before gluing the top edge . It may even help to place your lampshade on a lamp with the bulb on to give you a better look at how it will lay and how the light will shine through.
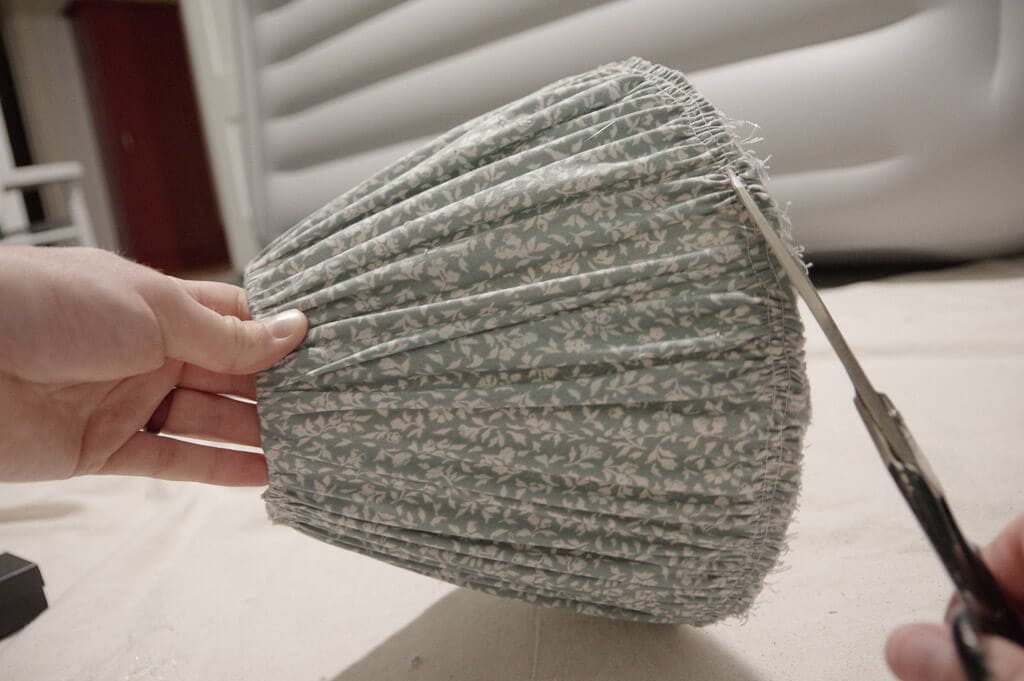
Once the gathers are distributed to your liking, it’s time to start gluing. The fabric on the shade needs to be taught. As you can see in the photos below, I had a little excess fabric which I just glued to the inside of the lampshade. I could have potentially trimmed the excess fabric once I finished gluing it all down, but I was hesitant to cut the seams holding the gathers. In hindsight it likely would have been ok, but either way, it still turned out well!
Again, start gluing from the back side of the lampshade and work your way around until the entire top edge is glued down.

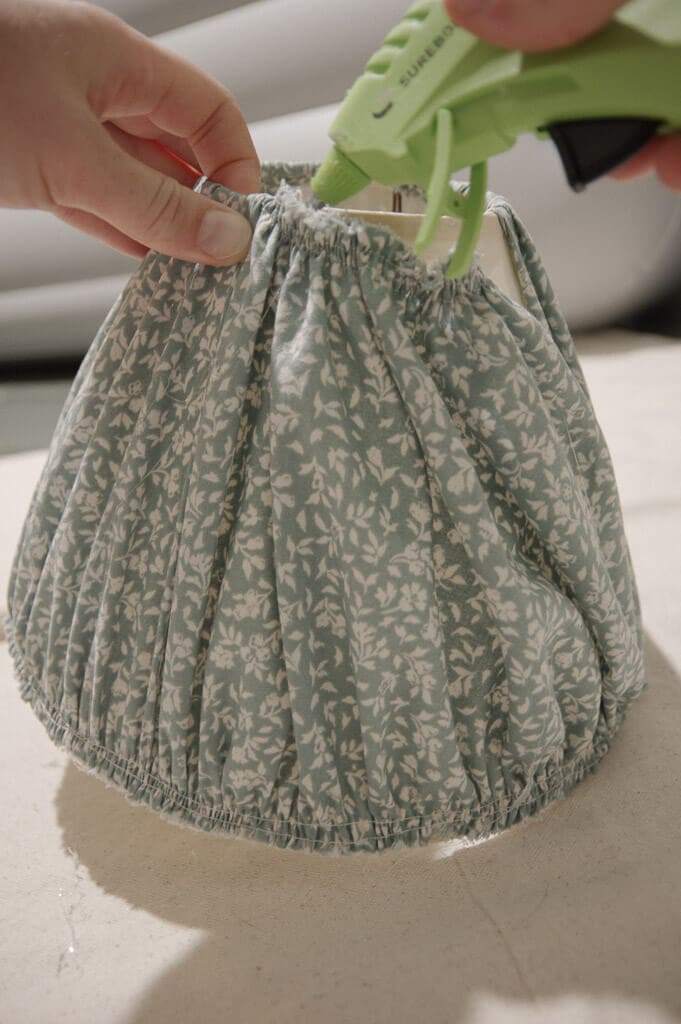
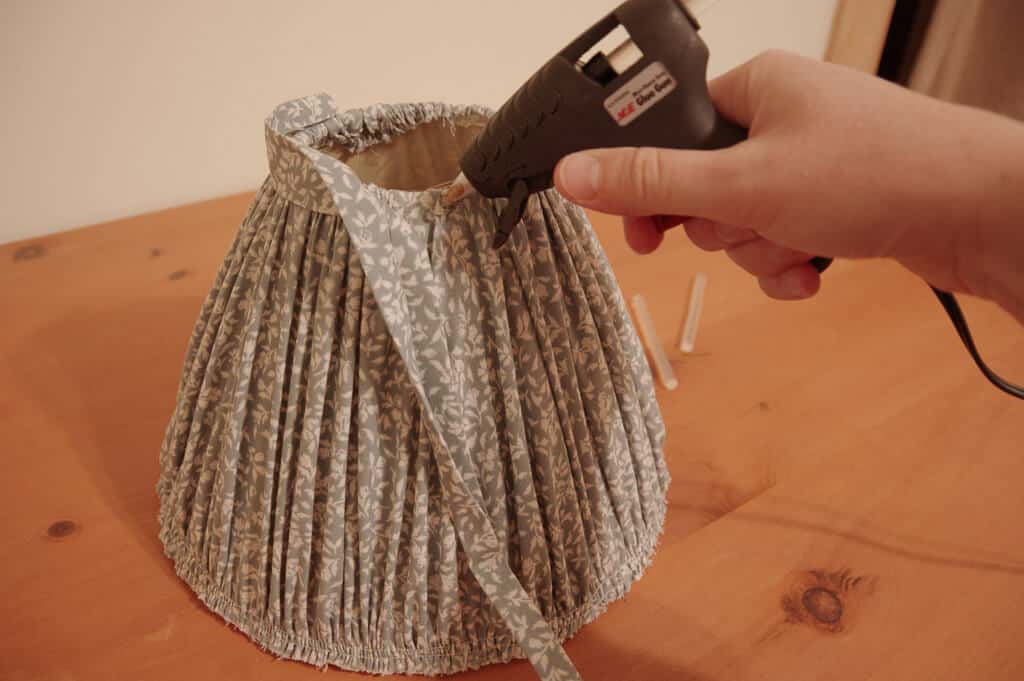
Lastly, glue down the overlapping seam at the back of the lampshade.
Trim excess threads as needed.
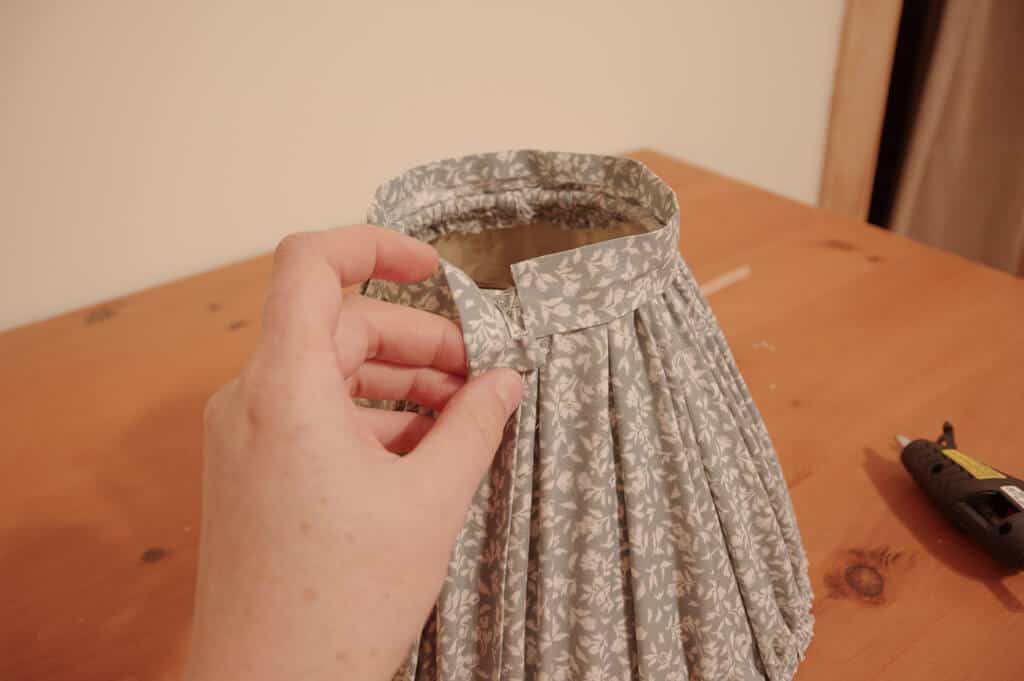
Make and Attach Binding
Measure the circumference of the top of the lampshade. As an example, let’s say it’s 15 inches. Cut a strip of fabric that is 2 inches wide and 16 inches long. You will want an extra inch for overlap.
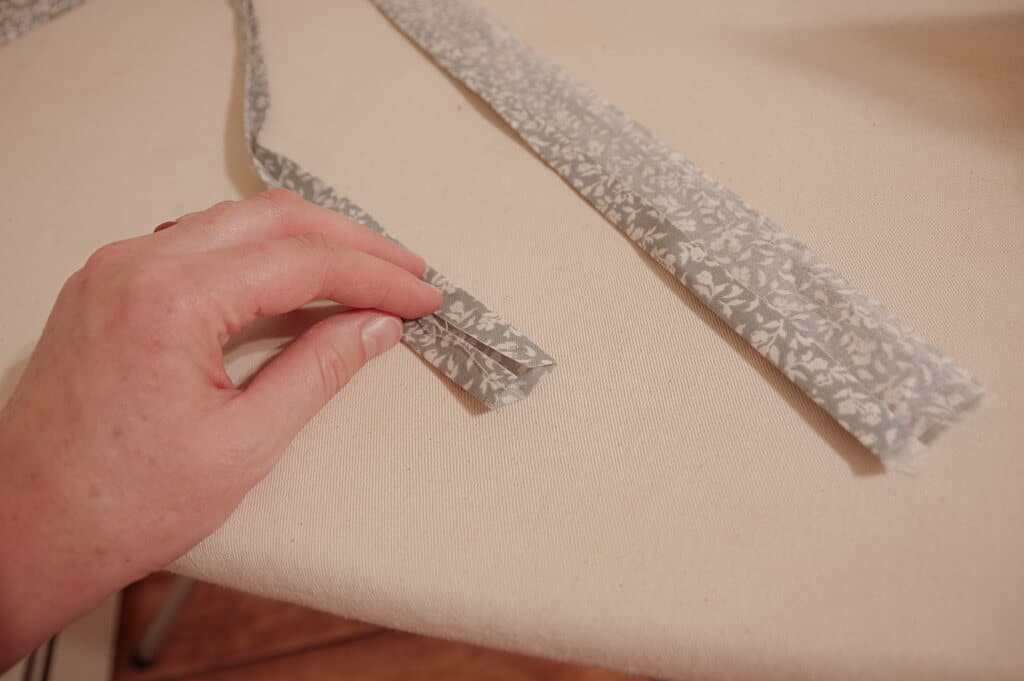
Fold the strip of fabric wrong sides together width wise and iron flat (essentially making it 1 inch wide). Next, fold it open and bring each long edge in to the middle seam (which you just created) and iron flat. Once finished, you should have a long strip of fabric which measures 1/2 inch wide and has 4 folds. This is very similar to bias tape, although not cut on the diagonal (which you could certainly do, I just didn’t). You could alternatively use premade 1/2 inch double fold bias tape.
Unfold the binding one time so that you can see the two raw edges meeting in the middle. Start at the seam on the back of the lampshade and glue down one side of the binding making sure the raw edges meet at the very top of the lampshade. Later, we will fold the other half of the binding over the top edge and glue it to the inside of the lampshade.
Glue down all but the last inch of binding.
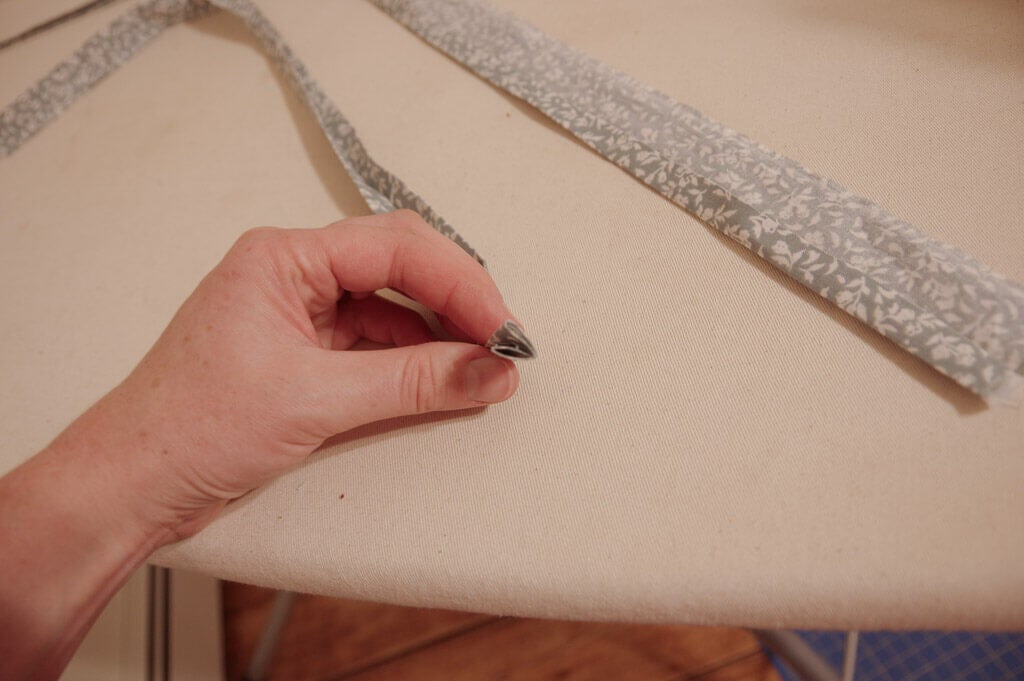
For the last inch of the binding, fold back the raw edge of your binding about 1/4 inch or so and glue to itself. Overlap the beginning of the binding and glue it down creating a finished seam.
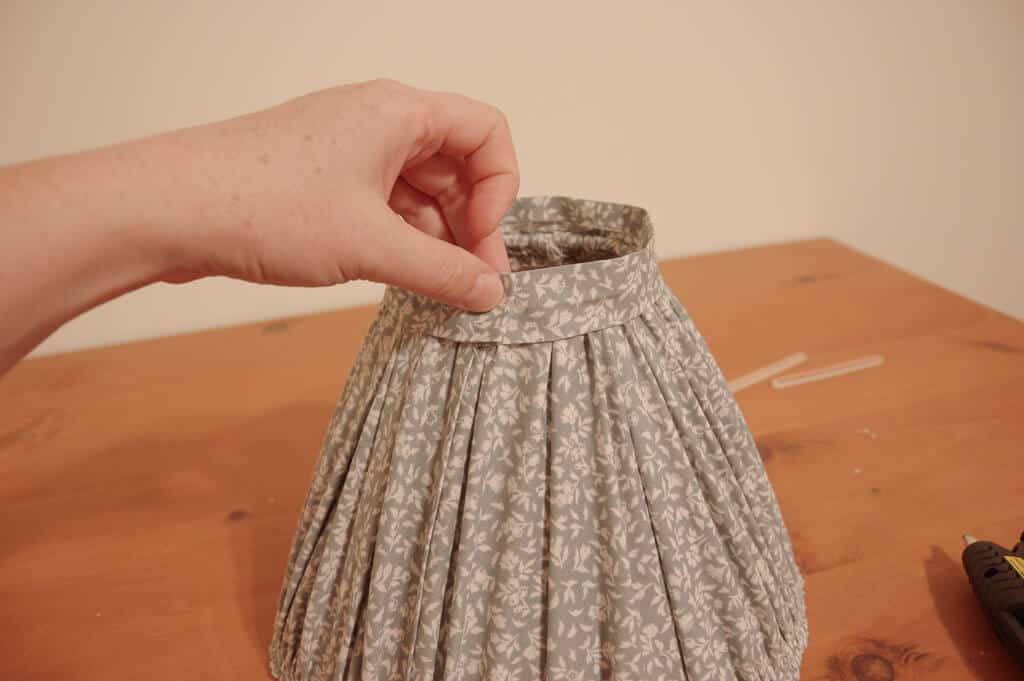
Next, fold down the binding to the inside top edge of the lampshade and glue in place.
Repeat the binding process with the bottom edge.
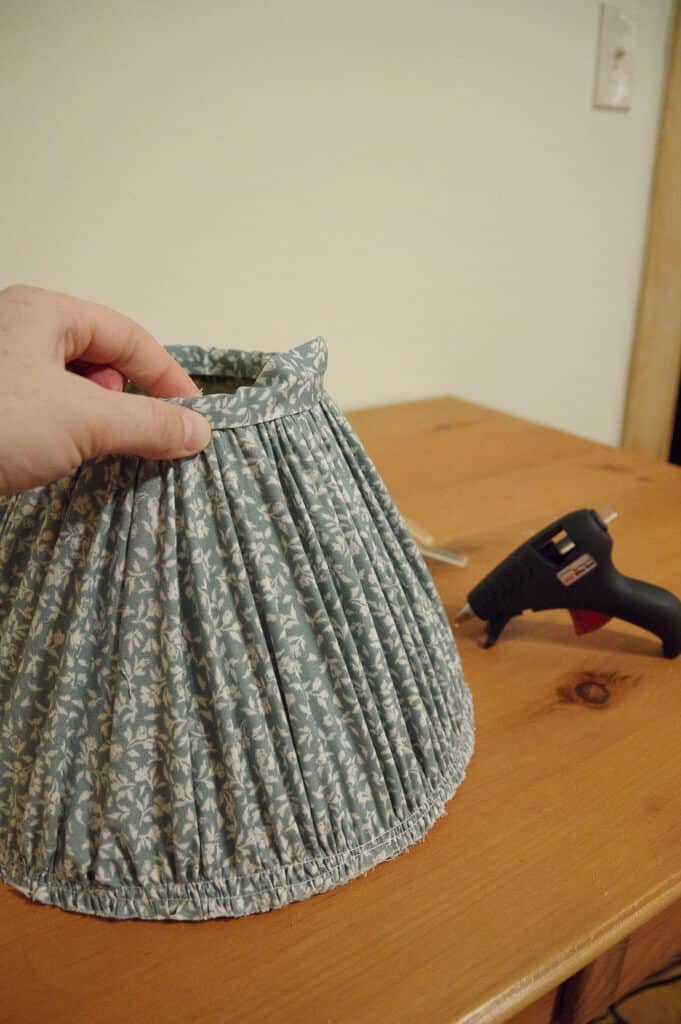
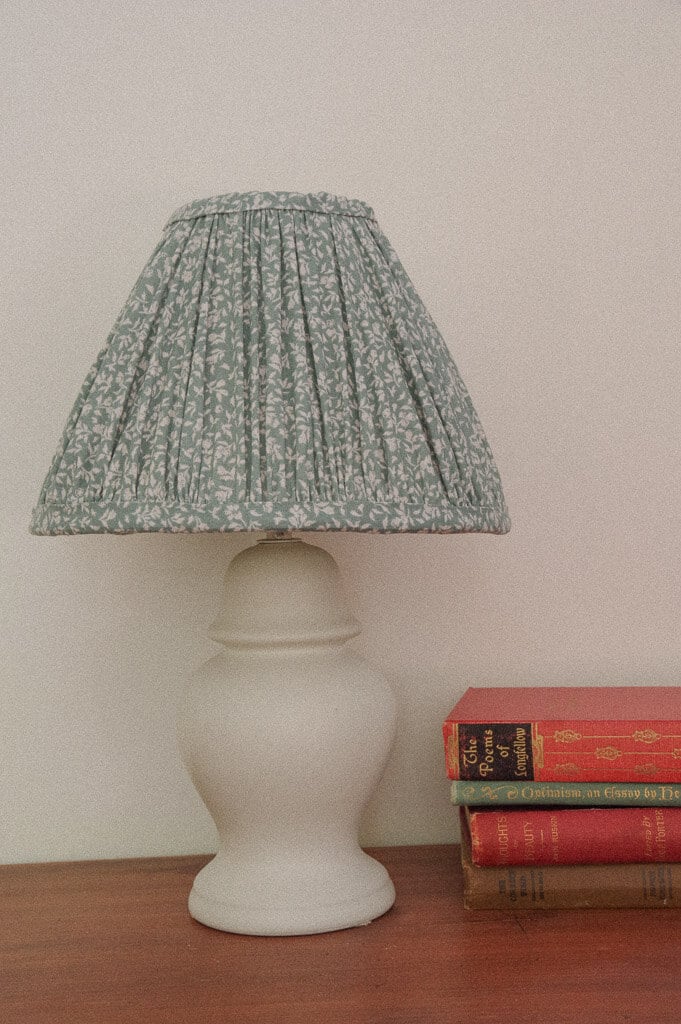
Viola!
Your lampshade is complete! Doesn’t it just add the cutest cottage charm?
If you enjoyed this tutorial, I’d love to know! You can comment below or tag me on Instagram @sweetmeadowfarmhouse!
Ever Warmly, Ashlei


I’m so excited to try this at home with one of my ugly lampshades. I have tons of fabric, thank you!
Ashlei, this really is the best way to make the gathers. I know you can fold and hot glue, but the charm is not there and it often turns out with an “ugly section” that you have to turn to the back. Take the time to baste and gather like she shows in this tutorial and you will be so proud of your work! You will soon find lampshades in your home that you didn’t know needed an update. 😉
Thank you, Melissa! That’s so kind of you to say! And I have to giggle a little at your last sentence because it’s so true!
This is so cute! Going to use a vintage fabric to make a shade for an antique lamp that needs one. This tutorial is exactly what I needed. Thank you!
Oh Perfect! I’m so glad!
Perfect timing! I got some lamps with the intention to do something similar! Thank you for the tutorial
Oh, how fun! I bet they will turn out adorable! You’re very welcome!
These are adorable! Can’t wait to try this! I especially love the fabric you chose. Thank you for such detailed instructions and helpful pictures.
Thank you so much! I’m glad it’s helpful!