Fabric Birthday Banner with Free Pattern
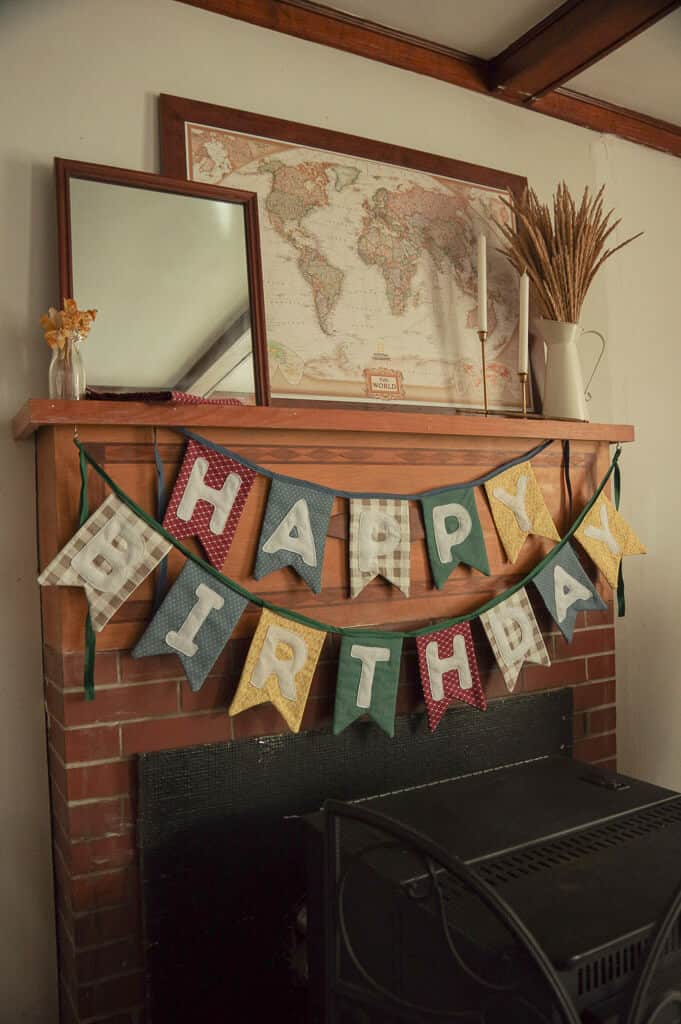
Learn how to make a classic birthday banner with this easy to follow tutorial. Timeless, elegant and sustainable, this banner is the perfect addition to your birthday celebrations!
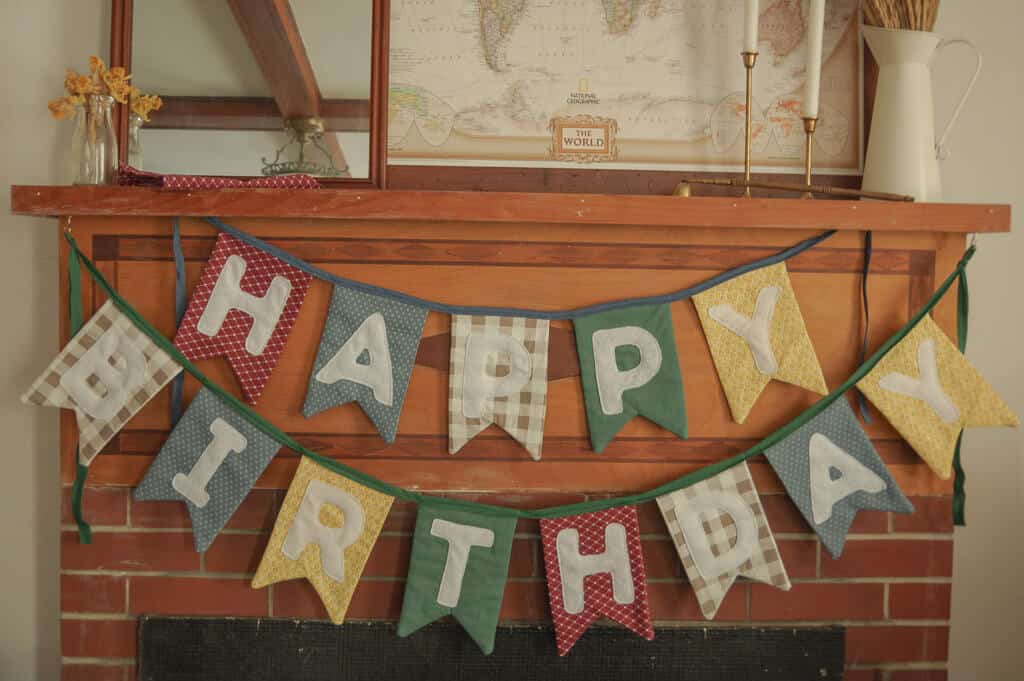
As we prepared for our son’s first birthday we brainstormed what traditions we wanted to start with our family. My husband and I collaborated and came up with this idea: a hand crafted birthday banner for each of our children that they will one day take with them as adults.
As I searched the fabric store I was certain on one thing: I wanted something timeless. It took a bit of work, but I eventually found these fabrics. I love how it turned out and can’t wait to bring it out year after year as my baby grows.
This post contains affiliate links. As an Amazon Affiliate, I may earn a small commission on qualifying purchases at no extra cost to you.
Finding time to sew
With all the projects we have going on around the house, this can certainly be difficult. One thing I’m learning is to use my margins well. Whether that’s the time before my baby is up in the morning, naptime, when he’s playing contentedly by himself or after he goes to bed. I try to be as intentional as possible with those times and they really do add up! But also to be totally honest, the week before his birthday party was a very busy week and I had to stay up very late the night before his party to finish the banner. It was completely worth it though and I’m certain I’m not the only mother with late night projects before a birthday party.
A banner or a bunting?
Before we jump into this pattern we need to discuss something…Do we call this a bunting or a banner? Let’s see what each of these actually is…
Banner: A strip of cloth bearing a slogan or design.
Bunting: A collection of flags considered as a group.
With this knowledge, I would have to say wholeheartedly that this is a bunting. A beautiful and classic name for such a timeless decor item. However, in our day and age, the term “banner” is much more common and would 100% be applied to this piece. I will personally be calling this a bunting, but I have labeled this pattern as a “Birthday Banner” as that is what it is most commonly called today.

What are the banner flags called?
In the process of writing this pattern, one of the most interesting things I learned was that the individual “flag” on a bunting is called a pennon. I’m guessing this is also related to the term pennant. So, of course, for clarity (and also for fun) the instructions below refer to the banner flags as pennons.
Materials Needed for a Birthday Banner:
Pattern – This can easily be printed at home. Make sure to print at %100 (not “scale to fit”). UPDATE: The pattern now includes the entire alphabet, numbers 0-9 and several symbols.
Fabric – A minimum of 1 ½ yards of 44” wide fabric. However, because I wanted a mixture of fabrics, I purchased ½ yard of 5 different fabrics. I did have a bit of fabric leftover which I am saving to use at a later time. If it’s helpful to know, ½ yard of 44” wide fabric will make 6 completed pennons. Take into consideration how you want the banner to look. How much variation in color/pattern do you want the pennons to have? Write down what you decide on so that you can reference back to it while sewing.
Lining (optional) – 1 ½ yards of 44” wide cotton fabric, muslin, or drop cloth. I personally really like the drop cloth as it gives a bit of structure to the banner adding to its sophistication and elegance.
Double fold bias tape – Double fold bias tape – 170 inches of ½ inch double fold bias tape (I love purchasing a large roll from Amazon) OR 2 packages of ½ inch double fold bias tape, 3 yards per packagege
Felt – 7 pieces of 8 ½ x 11 felt in white
Thread – White for the letters, and coordinating thread for the pennons and bias tape.
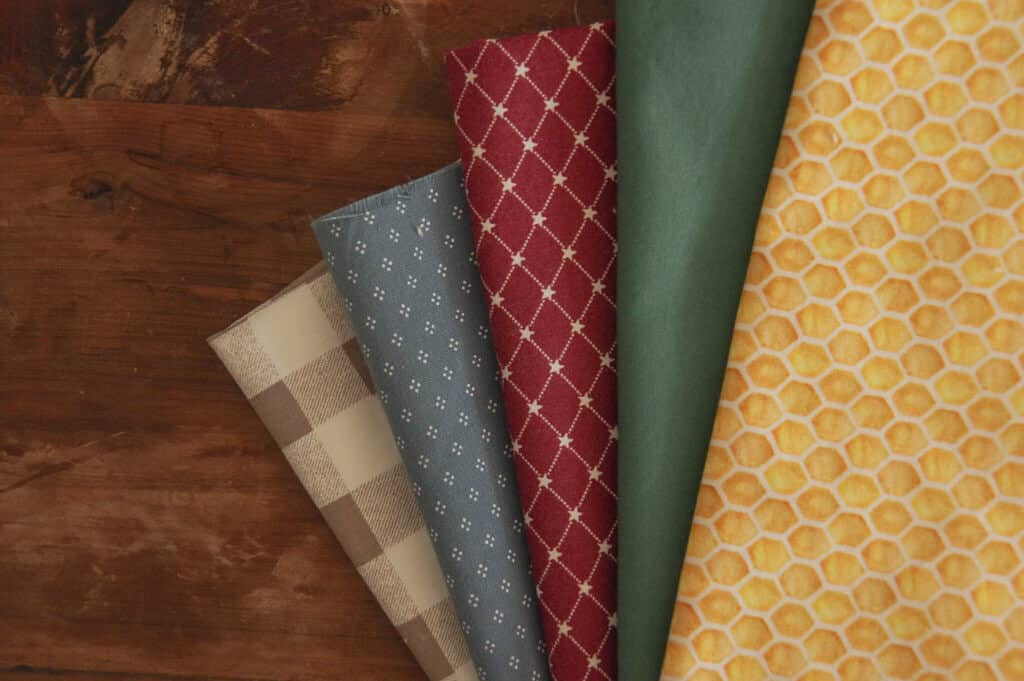
Supplies and Tools Needed for a Birthday Banner:
Sewing Machine
Pins
Sewing Shears
Sewing gauge or tape measurer
Instructions:
Wash and Iron Fabric
As with all sewing patterns we will start at the very beginning…a very good place to start…wash and iron the fabric.
Cut Out Template, Fabric and Felt Letters
Cut out the pennon pattern and letter templates (I used a razor blade to cut the interior holes of the letters).
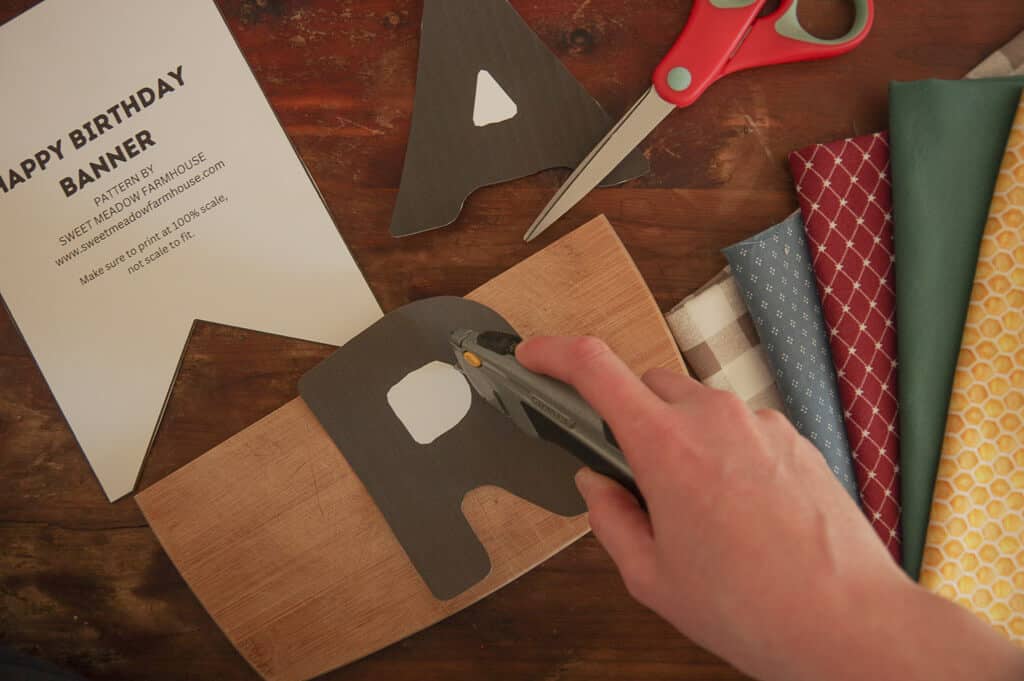
Pin the pennon template to fabric and cut around edges. Keep in mind the color pattern that you want for the pennons.
Cut out a total of 26 pennon pieces from the various fabrics. There will be a total of 13 completed pennons (two pieces to form 1 completed pennon).
For the banner here, I cut:
4 Red (2 completed pennons)
6 Blue (3 completed pennons)
6 Taupe (3 completed pennons)
4 Green (2 completed pennons)
6 Yellow (3 completed pennons)
If you are adding lining to the banner, cut 13 lining pieces out using the same pennon template
Cut out felt letters. I found the easiest way to do this was to hold the template on the felt, trace around the letter with a pen, then cut out. When I cut the letter out, I just made sure to cut around the marker so it wouldn’t show on my final product. You should be able to use each piece of 8 1/2 x 11 piece of felt for 2 letters.
Sew Pennons
Place both patterned pieces with right sides together. Place the lining piece (if using) on top (or beneath, as in the photo below). Sew around all edges except top with ½ inch inseam backstitching at beginning and end.
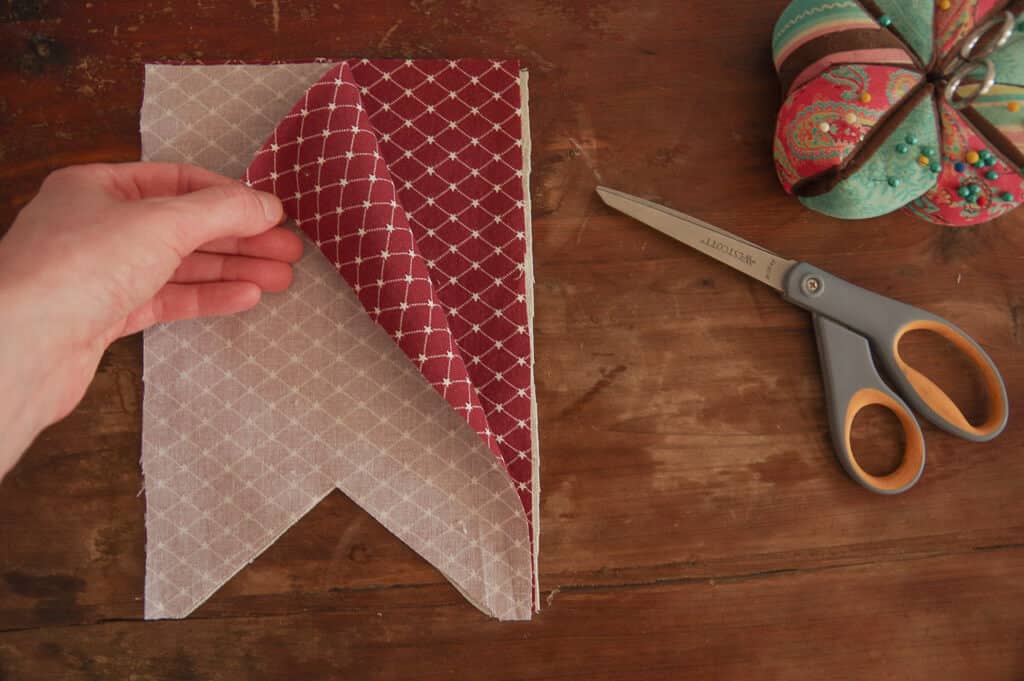
Trim up pennon tips and make a slit in the very middle between the two points as shown in the photo below. Fold the right side out and manipulate points so they are, well, pointy. A small pair of scissors or other pointy object will come in handy for pressing out the points (should I say point again…just to make a point?)
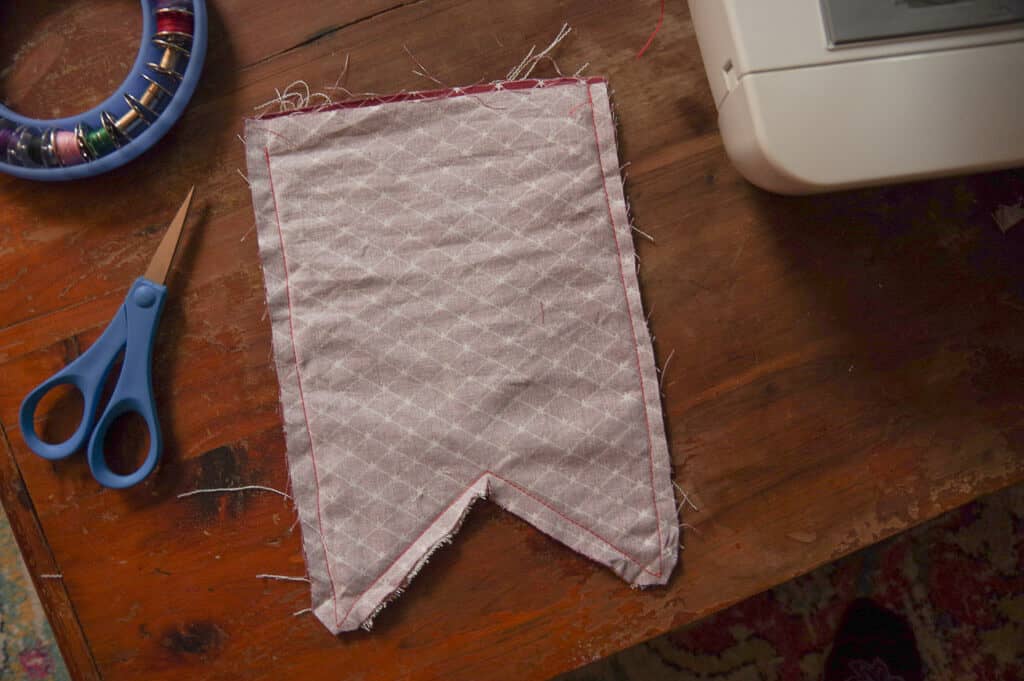
Iron pennon flat and set aside.
Repeat this process with all other 12 pennons.
Sew Felt Letters to the Pennons
BEFORE sewing letters to the pennons, lay out all pennons in the order you want them. Make sure you like it, or adjust as needed. Place letters on top to double check. Unless you are able to sew all letters on in one sitting, I highly suggest taking a photo right now to reference back to.
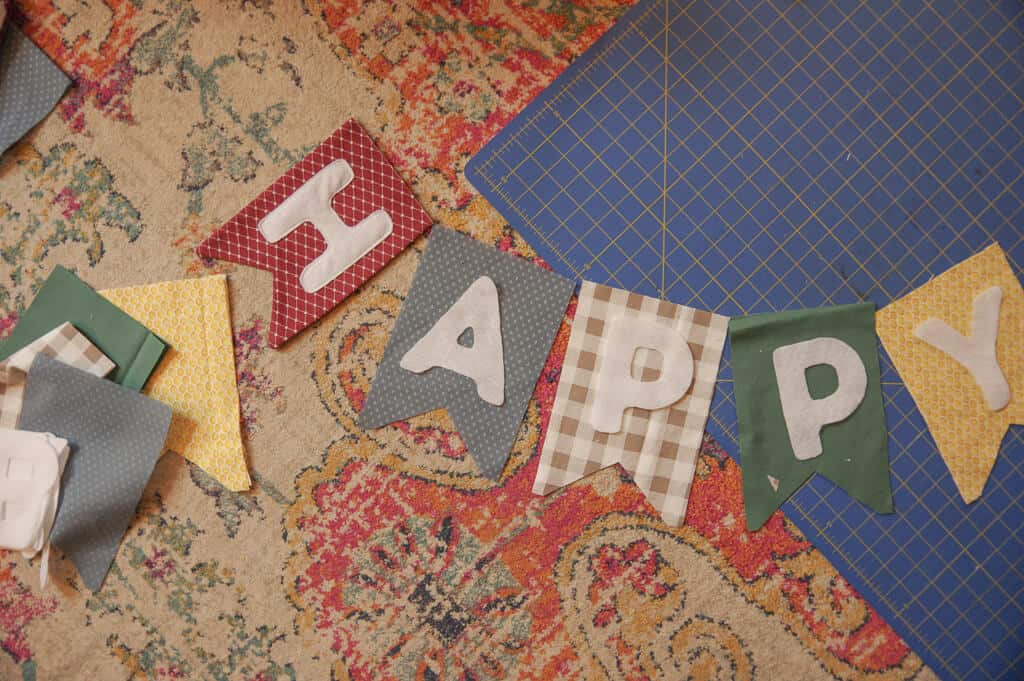
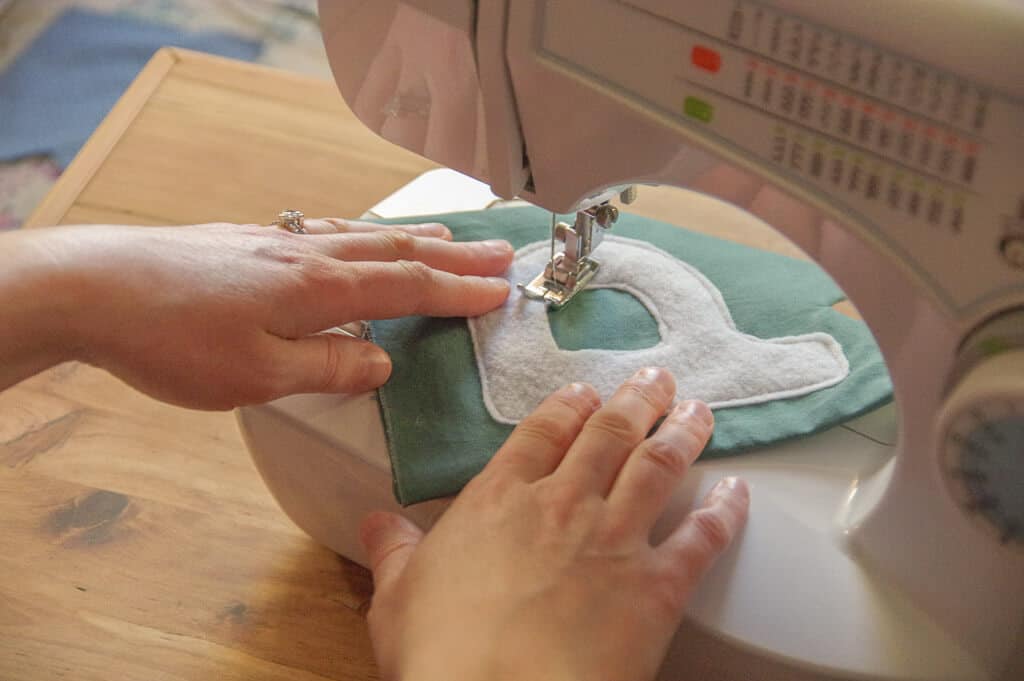
Place felt letter, centered, on the pennon with the highest point (or points) of the letter 1 ¼ inch below the top edge (this is where a sewing gauge really comes in handy). Pin in place and sew onto pennon with ¼ inch seam allowance. Make sure to sew interior part of letter as well…ie the two holes inside the letter “B.”
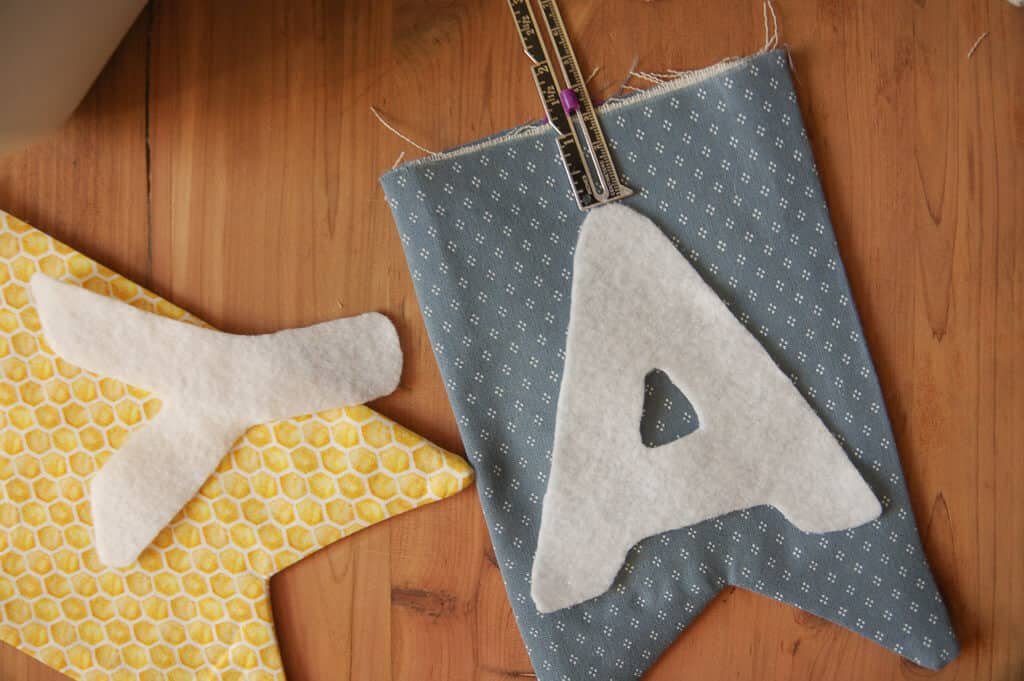
Repeat this process with all letters. This is such a fun step as you start to watch the bunting come together!
Adding Bias Tape
Iron both packages of double fold bias tape.
Pin and sew “HAPPY” banner. Measure 18 inches from one end of bias tape and pin “H” pennon in place between the bias tape folds (see photo below). Measure 1/1/4 inch past “H” pennon and pin “A” pennon in place between the bias tape folds. Continue with the remaining letters (P,P,Y) leaving a 1 ¼ inch space between each letter pennon.
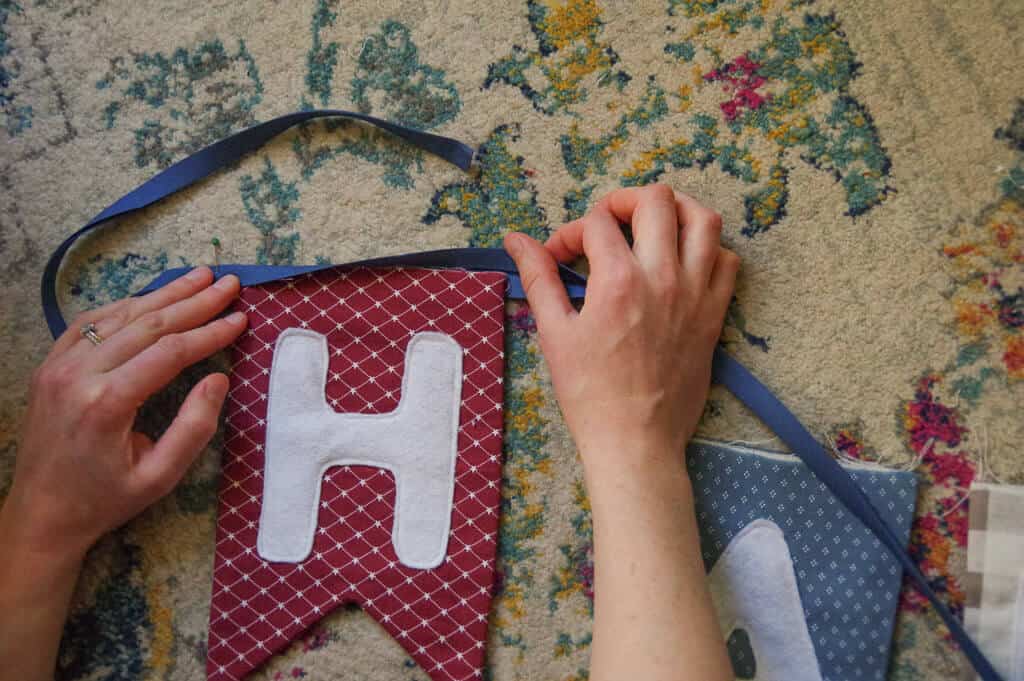
After pinning the “Y” in place, measure 18 inches on the bias tape and cut. This will give 18 inches on either side of the banner for hanging.
Starting at one end of the bias tape, stitch bias tape and pennons together. As you sew, keep in mind catching all the layers in the stitches (all the folds of the bias tape as well as the pennons). I left the ends of the bias tape open (unsewn) but feel free to sew them shut for a more polished look if you wish to.
Pin and sew “BIRTHDAY” banner. Follow the same process as above except the excess bias tape on either end will measure 24 inches on each side instead of 18 inches.
Time to Celebrate with your Birthday Banner!
Congratulations! You’ve just made the most adorable birthday banner! I know this will add so much charm to your birthday celebrations for years to come!
As always with love,
Ashlei
If you try this project and enjoy it, I’d love to see it! Tag me on Instagram @sweetmeadowfarmhouse and let me know!
This is such a cute idea! It will leave your children with wonderful memories ❤️
Thank you so much, Jessie!
I am SOOOO making this for my grown boys!! We STILL go crazy over birthdays even though are grown & flew the coop!!😍
Yay!! I hope you love it so much!!
This is so beautiful and timeless! I love the idea of having one for each child and gifting it to them to use for future grandbabies ☺️
Thank you so much, Anna! Yes, I owe that idea all to my husband!
How fun is this! I love that you can use this for years to come. Thank you for the easy to follow step-by-step instructions and photos!
You’re so welcome! I’m glad you love it!
What a great tutorial, these look fantastic and love the letters with felt!
Thank you so much Nikki!
Just wondering what font you used for the letters? I would love to use my cricut to cut out the felt instead of using scissors so that it’s perfect sizing.
Hi Anna,
I used the font, “Intro Rust” in size 500. The letters end up being just over 4 3/4 inches when measured from top to bottom. I hope that’s helpful!
Could you possibly provide a full alphabet for the pattern so the banner could say anything? Thank you.
Hi Shay, That’s actually a project on my to-do list (great minds think alike!). I’ll have it finished by the end of the month and will notify newsletter subscribers via email once it’s complete and will also be updating the download on this post. Thanks for the great question! Happy Sewing!
Can you see the stitching of the letters from the back of the banner? If so could I sew the letters on before sewing the pennons together?
Hi Jennifer,
Yes, you can see the stitching on the back. One thing I do really love about that is it almost “quilts” the layers together, which makes the pennon seem even sturdier (but which is really ultimately unnecessary because no one is taking this on a battlefield..haha). If you would rather not have the stitching seen from the back, just sew the letters on prior to stitching the pennon layers together. I hope that helps! Happy Sewing!